和訳は英文の後にございます。/ The Japanese translation is below the English text.
Ceramic Repair
Table of contents

1. Cracked plates
2. Ceramic repair using milk
3. Rice water
4. Japanese methods
5. A planned leakage of coffee
6. “Kan’nyuu”
7. Old plates
1. Cracked plates
At a nearby antique/collectibles store, I bought a couple of dinner plates with pretty birds–looking like a kind of thrush–painted inside.
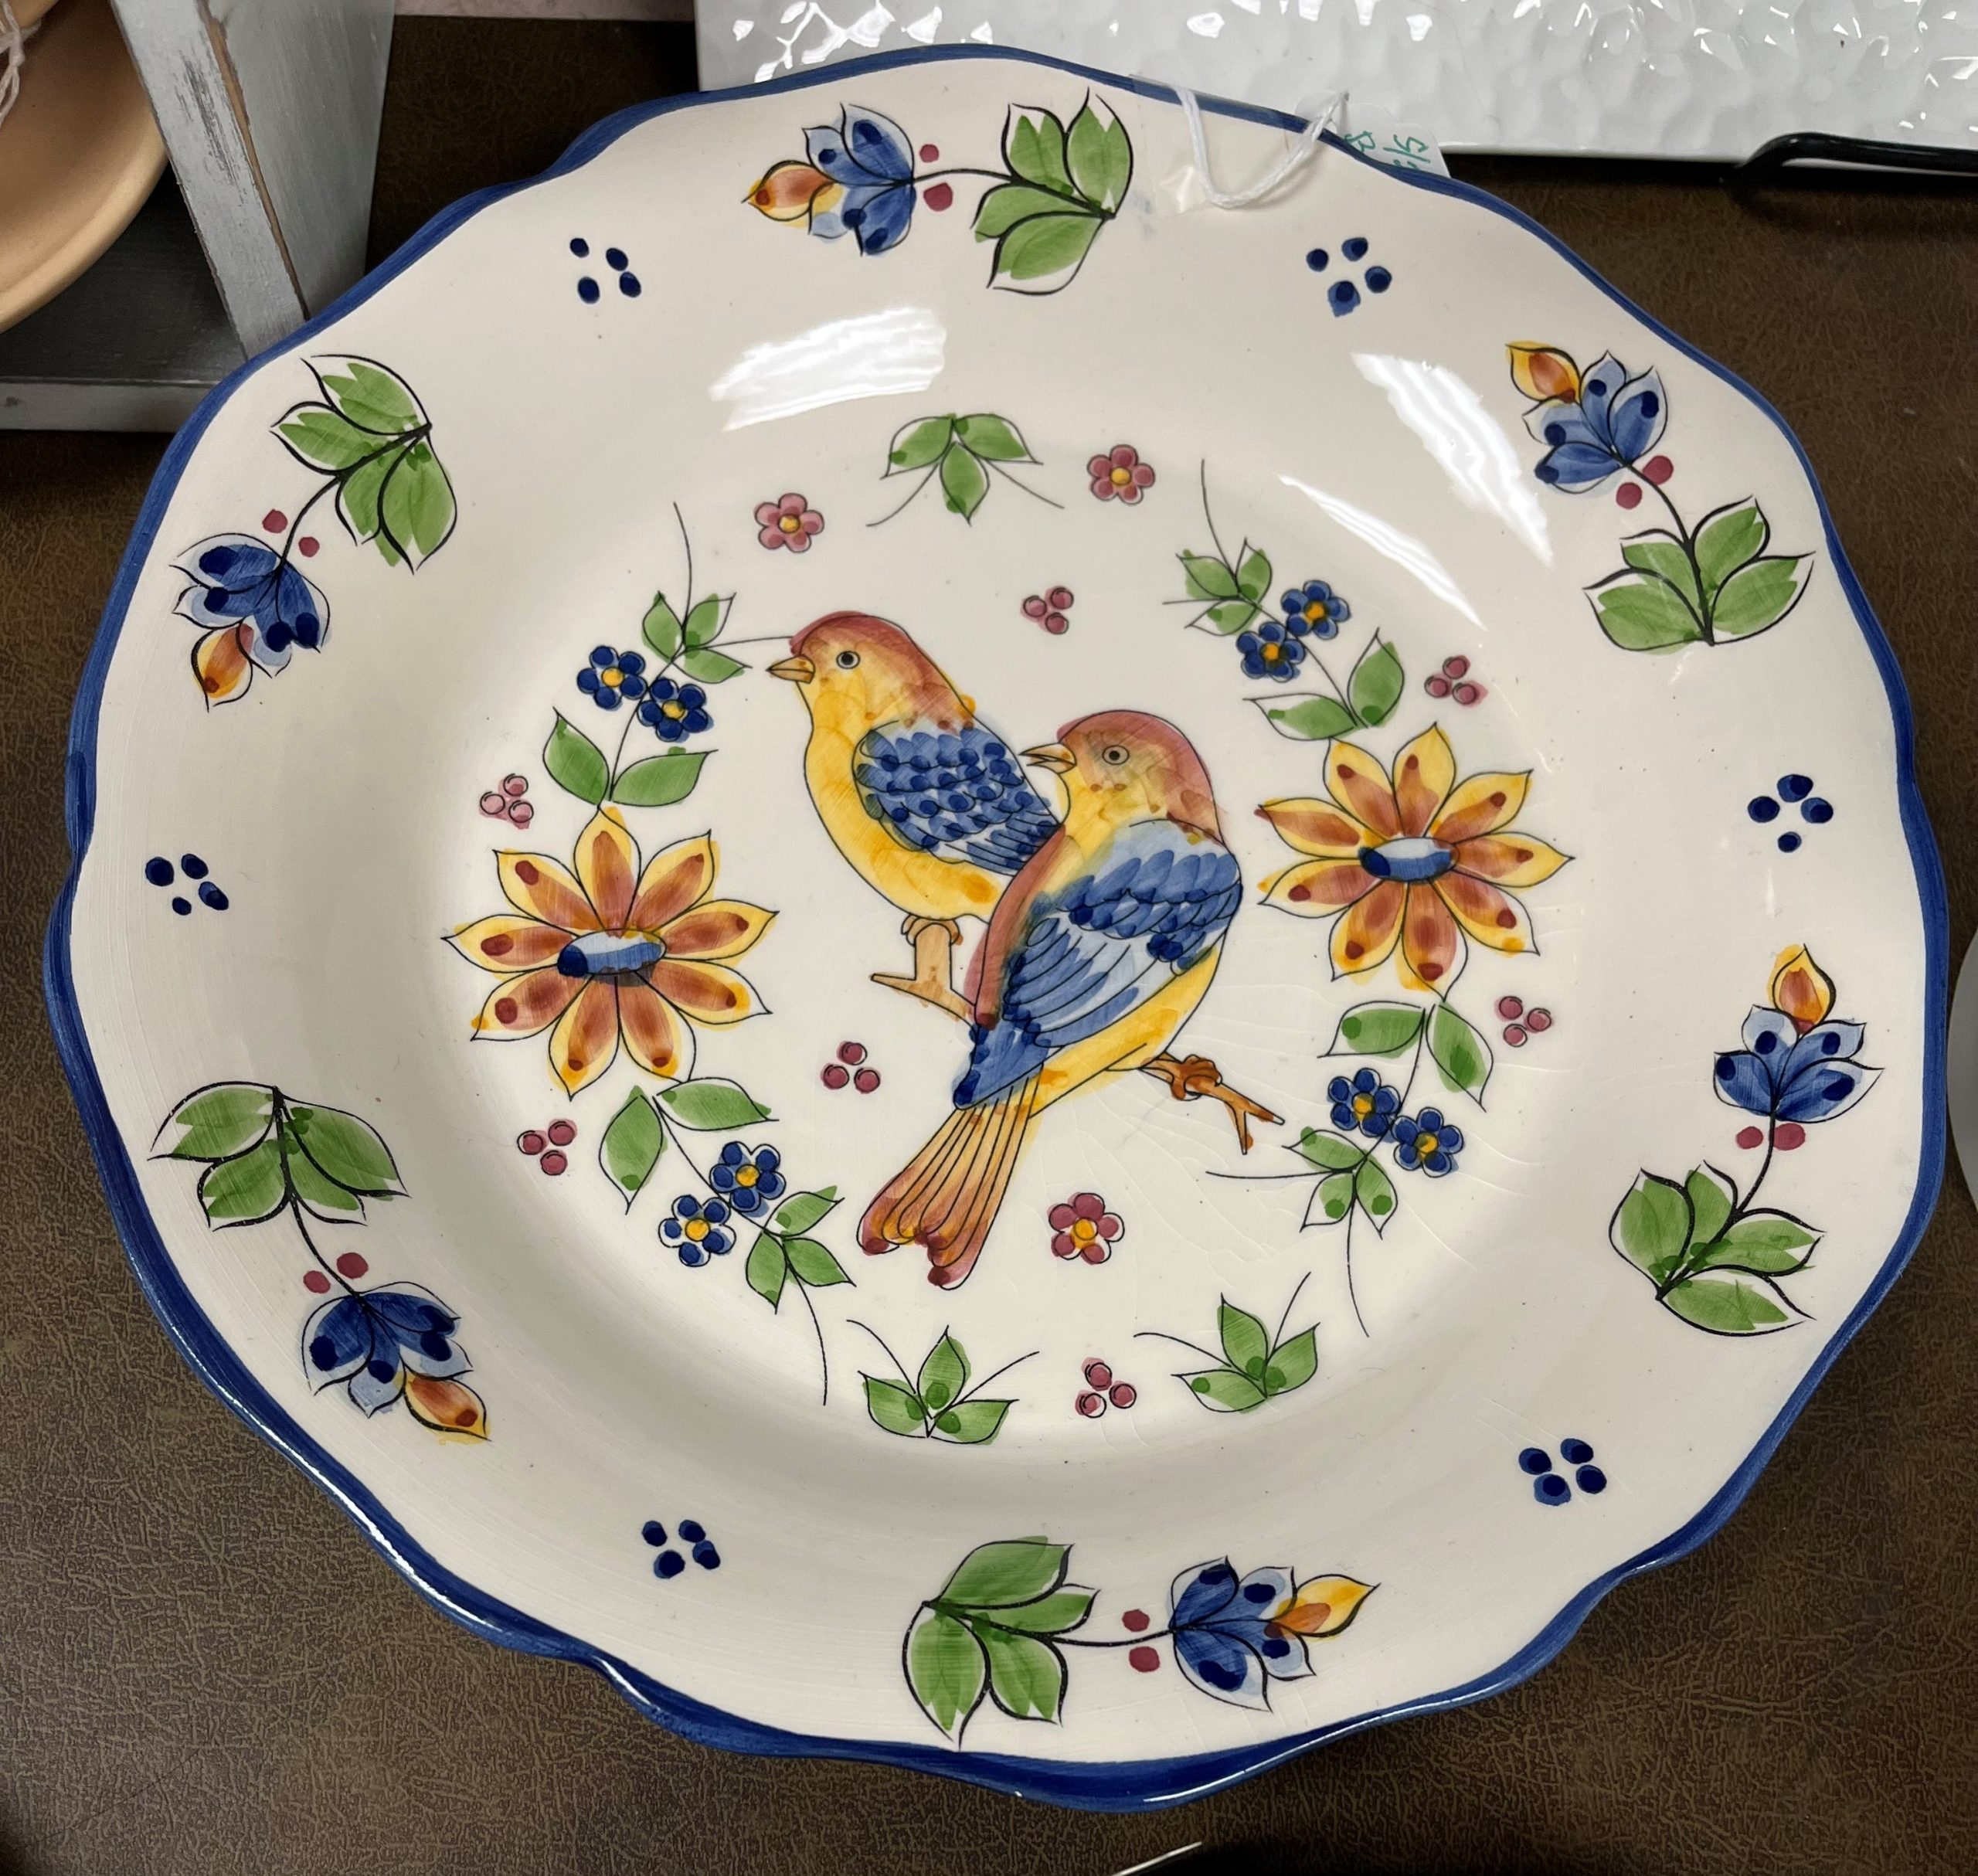
When I brought them home and washed them, cobweb-like very fine lines suddenly appeared all over the inside of the plates. Many cracks were in the inside where the birds were painted. Fortunately, the cracks didn’t reach the back.
I wondered if the plates would be broken soon or we could still use them. Whether I would use them for eating or just as a wall decoration, it must be better to reinforce them. So, I went on the Internet to search a method to repair ceramic with cracks.
Soon I found an American website saying “You can use milk and repair cracks on ceramic.”
I wondered if it was true, but I tried; the only ingredient I needed was milk. It went well.
2. Ceramic repair using milk
The method was immersing the plates in a lot of milk and simmering over the stovetop for about one hour. Then I let them cool and washed them, that was it.
The science behind it is that casein in the protein in milk changes into natural plastic by heat, and goes into the cracks and hold them fast.
I have used these plates six times or so since the milk bath. At the time, they both looked OK.
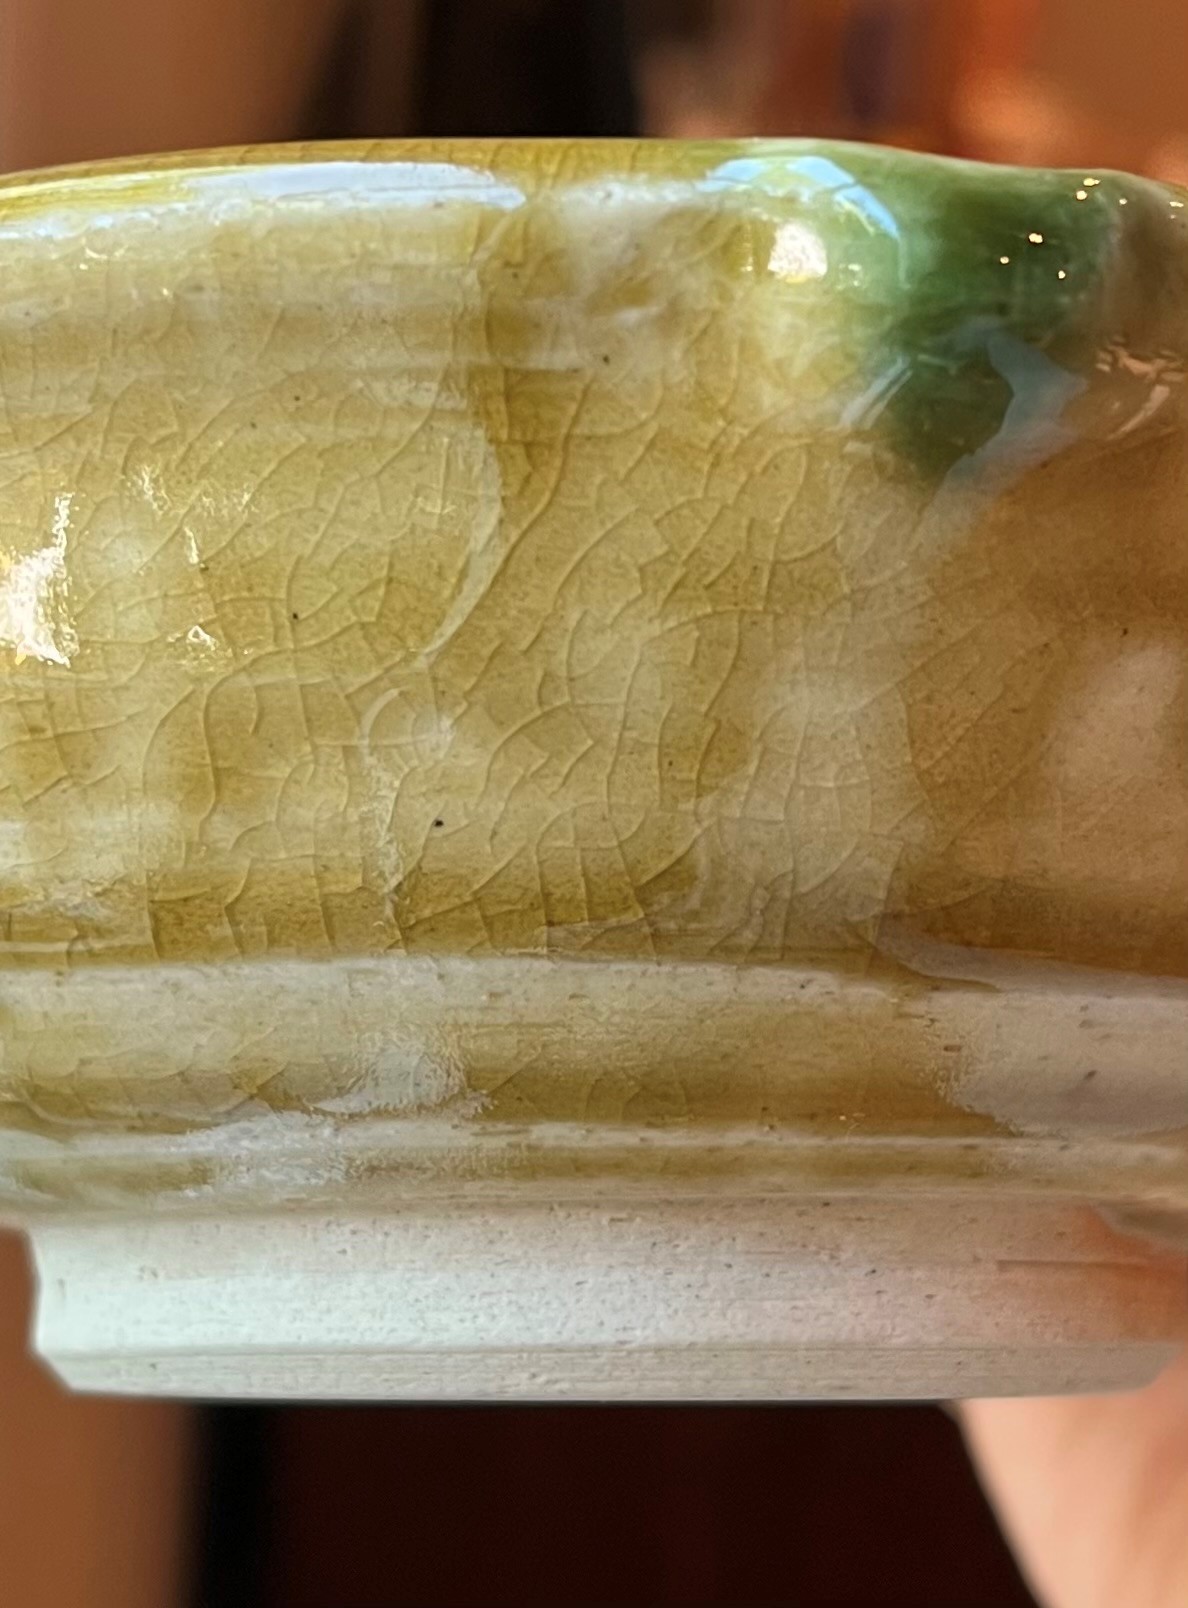
It seems that the cracks have occurred only in the layer of the glaze. We can still see colorless fine lines. However, the water doesn’t go into them any more when we wash.
According to the website, this milk method works not only on cracks but also on broken ceramic pieces. Not something totally shattered, but such things as a plate broken into two or a mug with a broken handle, I think, because they tell you to hold the pieces together with rubber bands and cook in milk for an hour.
3. Rice Water
It is not with milk, but in Japan, there are traditional methods of repairing or reinforcing ceramic.
One of them and available to anyone is using the water in which you wash your rice before cooking. The water is clouded with white color since it contains fine particles of rice. Let me call it “rice water”.
Usually, we discard rice water and add fresh water in the pot to cook rice. But some people don’t discard rice water but keep and use it in such ways as to give plants water with nutrients, to wash their face with very mild exfoliation, and to reinforce ceramic.
4. Japanese methods
Depending on the potting soil, ceramic vessels can have many tiny holes on the surface. When you put liquid in it, it goes into the holes. Particularly, unglazed ceramic such as a terracotta plant pot absorbs water well. As time goes by, the absorbed liquid can expand the holes and at times, eventually, break the ceramic.
Therefore, in olden days, people said you should cook the ceramic vessels in rice water first thing after purchase. It is because when heated, the miniscule rice particles in the rice water become glutinous, go into the crack and seal the holes. When you buy a big ceramic pot, you put rice water in it and cook on the heat, thereby sealing the inside surface.
When I was small, my mother would say, “We sometimes used cooked rice grains as a substitute for glue.” And I tried with Japonica rice that we had at home. For sure, you can seal an envelope if you squash a few cooked rice grains with your fingers, rub them on the flap and dry. I guess rice particles in rice water become glutinous and then hard in the similar way.

Another well-known Japanese way to repair ceramic is “kin-tsugi (repairing with gold)”. It is not a method for families but for trained artisans. They repair valued ceramic bowls and plates using pure gold! Sometimes, the vessel looks even more interesting and artistic with the golden lines which put the pieces together.
5. A planned leakage
During a conversation about the rice water method, someone told me about an interesting coffee mug.
The mug was an expensive ceramic vessel hand-made by a Japanese artist. Her company had bought it for “when a very important client visits.”
However, when they poured coffee into the brand-new mug, the coffee leaked from the surface of the mug. They remembered the explanation of the artist, and didn’t complain. As they repeatedly poured coffee, it stopped leaking. It was because the coffee grounds went into the tiny cracks and holes on the surface and sealed them.
The artist had made the mug so that the prospective owner could “participate” in and completes the making of the mug by using it. I thought I would feel very attached to it if the mug was mine.
This story reminds me of “bonsai”. When a master artisan prepares a plant as a bonsai and delivers it to you, it is usually incomplete and under development although it already looks beautiful. He cultured the plant carefully calculating the time so that after the delivery, certain time will pass and make those planned changes happen. And only after that can you fully see the original image of the artisan. Sometimes, it takes decades for it to happen. This coffee mug sounds a little like a bonsai.
6. “Kannyuu”

Some people asked me if the cracks of my bird plates were “kan’nyuu”.
I didn’t understand, and learned that it’s a kind of decorating technique of ceramic practiced in such places as China and Japan. The artisans make cracks purposefully so that they cover the surface, looking like a pattern.
You can use the kan’nyuu technique only for glazed pottery. The reason is this is a technique utilizing the difference in the contraction rate of the baked glaze and the potting soil.
To make the crack-like pattern stand out, they usually don’t paint images and patterns where they will put kan’nyuu over it.
Pottery with “kan’nyuu” can be very expensive, but not always so. Actually, after I began to write this post, I found kan’nyuu on my favorite set of mortar & pestle in my kitchen. A couple of years ago, I bought it in Japan from a peddler (for about thirty dollars). You may have one in your kitchen, too.
As for my new plates, I think time and use have made the cracks since the birds are hand-painted and they are made in Portugal.
7.Old plates
Only after six or seven times of use, my plates have had a new couple of thin cracks again on the surface. I am disappointed; it has not been even a month since I treated it with milk.
I wondered if the cracks in the glaze kept increasing as I used, washed, and stacked them; if people had to cook their dear plates in milk periodically; and if people in olden days would thus take care of their pots and plates in general?
When I told this to a French lady who has been teaching cooking classes and holding parties for decades in her home (which means who has a lot of plates), she said,
“I have been using cracked plates for thirty years, and they are just fine for me!”
I wonder if I didn’t have to do anything after all.
[End of the English text]
陶器の補修
目次 1.買ったお皿にひび 2.牛乳で陶器を補修 3.米のとぎ汁 4.日本の方法 5.コーヒーで補修 6.貫入 7.古いお皿
1.買ったお皿にひび
近所の中古品のお店で、ツグミのようなきれいな鳥の絵皿を買いました。
ところが、うちへ帰って水で洗うとひびに水が入って、クモの巣のような模様が一面に広がりました。絵のある側全体にひびが無数に入っていたのです。幸い、裏には届いていませんでしたが。
すぐこわれるのか、大丈夫なのか……、食事に使うにしても、壁に飾るにしても、ひびは直した方がいいと思い、インターネットで、陶器のひびを補修する方法を探してみました。
すると、米国のサイトに、「牛乳で陶器のひびを補修できる」というのがありました。
本当かなと思いましたが、必要な材料は牛乳だけなので、思い切ってやってみました。当座、成功しました。
2.牛乳で陶器を補修
やり方は、鍋に入れた牛乳に浸して、台所のコンロで1時間ほどふつふつ煮るだけ。あとは冷まして洗っておしまいです。
煮ている間に、牛乳の蛋白質の中のカゼインが変化して熱で天然のプラスチック材のようになり、割れ目の中に入り込んでしっかり固定してくれるのだそうです。
牛乳で煮てからすでにこのお皿を5、6回は使っていますが、今のところ大丈夫です。
ひびはうわぐすりの部分だけらしい。透明の細い線がかすかに残っています。でも、すくなくとも濡らしても水が入っていかなくなりました。
なお、牛乳で煮る方法は、ひびのはいった陶器だけでなく、完全に割れた陶器にも使えるそうです。粉々になったものはともかく、二つに割れたお皿や取っ手だけがとれたマグなど、ぴったり合わせて輪ゴムなどで固定して、同様に1時間煮るとくっつくとか。
3.米のとぎ汁
牛乳ではありませんが、日本にも伝統的な陶器補強の知恵があります。
その一つで、誰でもできるのは、お米を炊く時に出るとぎ汁を使う方法です。とぎ汁は、米の小さな粒が入っている白っぽい水です。
普通、お米を洗った後、炊くには新しい水を使い、とぎ汁は捨てます。でも、捨てずに取っておいて、養分のある水を植物にやったり、顔の肌をやさしく磨く効果があるのでこれで顔を洗ったり、陶器を補強するのに使ったりする人もいます。
4.日本のやり方
陶土によっては、陶器の地肌には微小な穴がたくさん開いています。水を入れると、その穴にしみこんでいきます。素焼きは特に、植木鉢のようによくしみこみます。しみこんだ水はだんだん穴を広げていき、結果的に陶器が割れることがあるのです。
そのため、昔の人は、陶器の食器を買ったらまず米のとぎ汁の中で煮よと言いました。加熱されると糊のようになって、とぎ汁の中の米の微小な粒が陶器の肌に入り込み、穴をふさいでくれるからです。大きな土鍋の場合は、中にとぎ汁を入れて煮ます。内側の鍋肌が封をされるというわけです。
私が小さい時、母が「昔はご飯粒を糊の代わりに使った」と言っていました。うちにあったジャポニカ米でやってみると、確かに、ご飯粒をつぶして封筒の蓋に塗り付け、乾かすと、しっかり封ができます。とぎ汁の中の米の粒子が糊のようになるのも、似ているのでしょう。
なお、お米以外を使う陶器補修の方法に、「金継ぎ」があります。家庭ではなく専門の職人が、割れた茶碗を純金で補修します。継いだ部分を含めて、お茶碗全体がもっと面白く、芸術的に見えることがあるので有名です。
5.計画された漏れ
米のとぎ汁の補修の話の流れで、ある人が面白いコーヒーマグの話をしてくれました。
そのマグは、その人の会社が「大切なお客様が来たときのため」に買っておいた高価なもので、日本人の陶芸家の特別な作品です。
ところが、新しい状態でコーヒーを入れると、そのマグの地肌からコーヒーが漏れたのだそうです。それについては、買った時に陶芸家から説明があったので、苦情を言わず何度もコーヒーを淹れているうちに、漏れなくなりました。コーヒーの微細な粉が少しずつ肌に入り込んでいったためです。
つまり、そのマグは、持ち主も制作過程に参加するというか、何度も使うことによって完成するように作られていたのです。それが自分ひとりの物だったらとても愛着がわくだろうと思いました。
このマグで盆栽を思い出しました。盆栽は、買い手に届いた時点では、立派に見えるけれども未完成というか発展途上にあります。盆栽の職人は時間を綿密に計算して盆栽を作るので、盆栽が買い手に引き取られたあと一定の時間経過と変化を経て、初めて完成した形になるのです。このマグは、盆栽のようですね。
6.貫入
鳥の絵皿のひびについて話したら、何人もの日本人に「貫入」ではないかと聞かれました。
知らなかったので調べると、貫入とは日本や中国で陶器を作る時、模様になるようにわざとひびを入れることです。
貫入は素焼きでなく、釉薬をかけて焼く陶器で行います。なぜなら、いったん焼いた釉薬と陶土の収縮率の差を利用した技術だからです。
ひびが入る部分は、模様を生かすため、絵や柄はあまり入れません。
貫入の器はとても高価なこともあるけれど、そうでないこともあります。この記事を書き始めてから、私も貫入のある器をひとつ持っていたと気づきました。とても使いやすい乳鉢と乳棒のセットで、数年前に日本で行商の人から買ったのです(30ドルぐらいでした)。皆さんの台所にも何かあるかもしれません。
一方、私の鳥の皿については、ただ古くなっているだけだと思います。絵が描いてあるし、ポルトガル製なので。
7.古いお皿
ところで、私のお皿ですが、牛乳で補修して6回か7回使ったところ、1カ月もしないうちにまた細いひびが一本二本入りました。がっかり。
洗ったり重ねたりしているうち、うわぐすりのひびはこうして常に増えていくのか。大切な食器は定期的に牛乳で煮なければならないのか。昔の人はそんなことをしていたのだろうか。
この話を、長年自宅で料理を教えたりパーティーを開いたりして(つまりお皿をたくさん持って)いるフランス人の女性に話してみたら、
「私はひびの見えるお皿を30年以上使っているけど何ともないよ」
と言っていました。
結局、気にしなくてよかったんでしょうか。
[和文部終わり]