和訳は英文の下にございます。/ The Japanese translation is below the English text.
Chirashi Zushi
Contents

1. What can you make with Japanese rice?
2. What is Chirashi Zushi?
3. Ingredients of Chirashi Zushi (About 5 servings)
4. The recipe
5. Notes on this recipe
1. What can you do with Japonica rice?
Recently, a couple friend bought good rice from Japan (Japonica rice) and asked us for a recipe using it. They are experienced cooks but had never cooked anything Japanese at home.
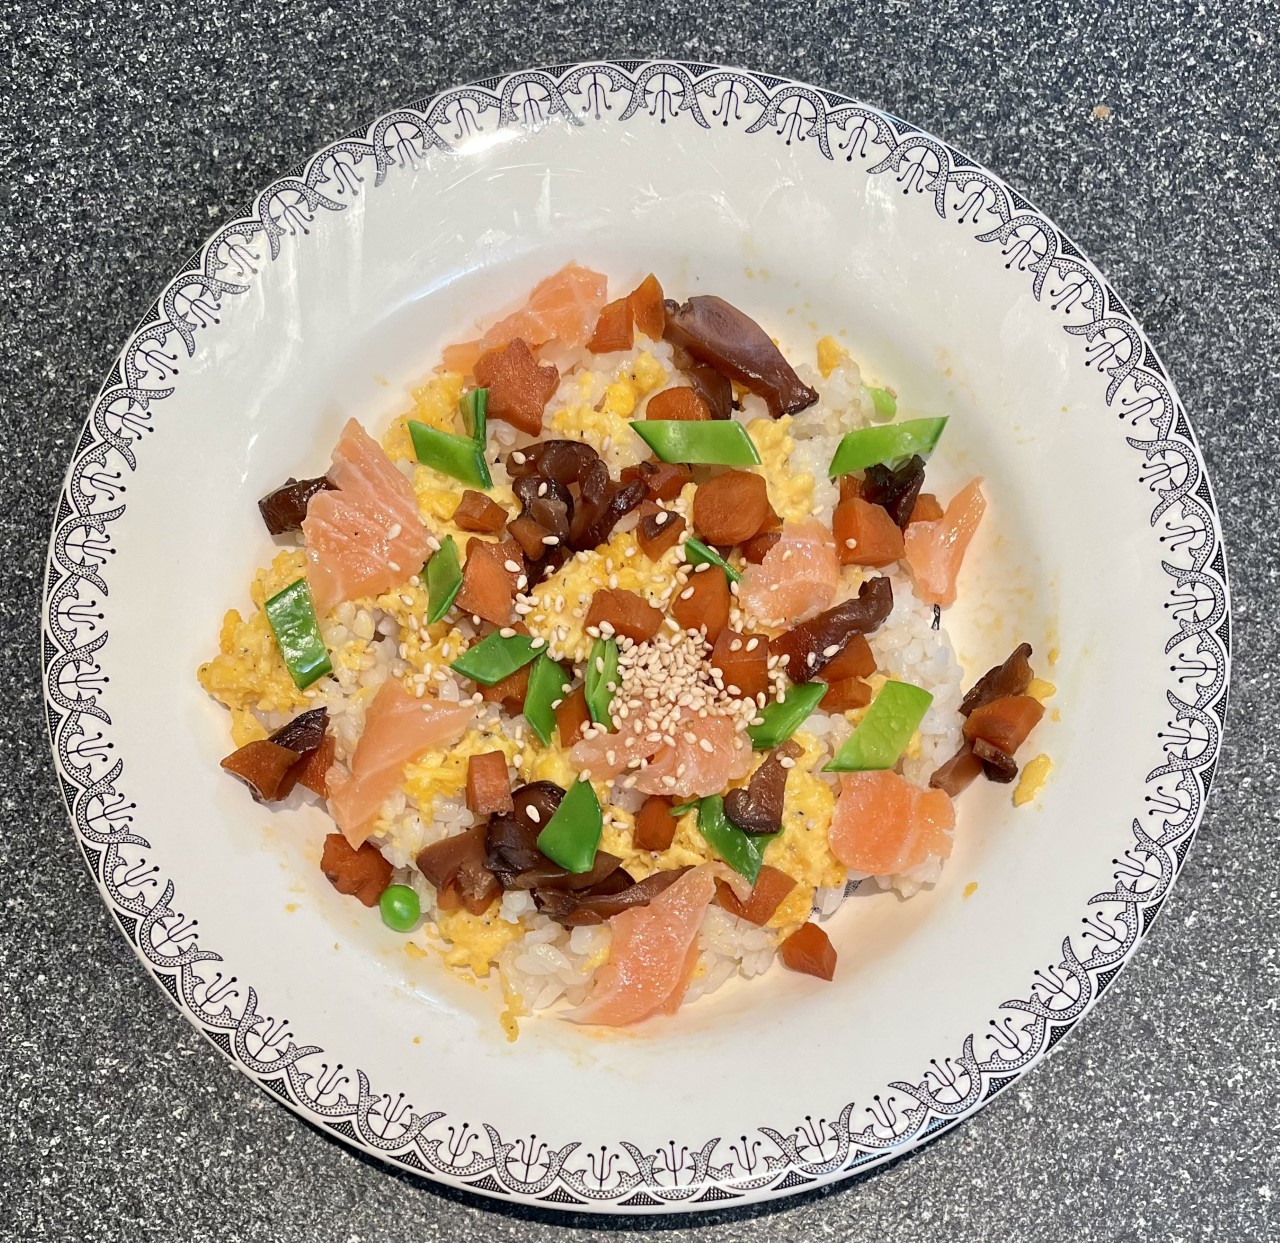
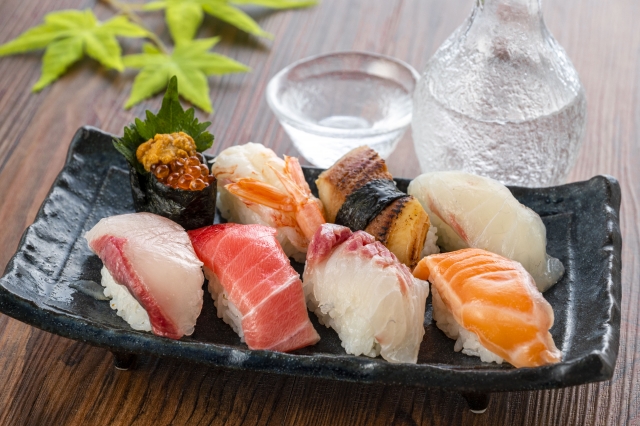
We recommended them a basic recipe of “Chirashi Zushi”. It’s a kind of sushi and very popular in Japan, and you can enjoy it like rice salad. After a few days, they sent us a lovely photo of “chirashi zushi” that they made. They liked it very much.
In this post, we will share the Chirashi Zushi recipe with tips to adjust to your own taste.
2. What is Chirashi Zushi?
What is Chirashi Zushi?
“Chirashi” is the masu stem of the verb “chirashimasu”, to scatter. “Zushi” is a sound variation of “sushi”, meaning vinegared rice. So, Chirashi Zushi means various ingredients sprinkled and scattered over the bed of vinegared rice.
Families with small girls often make this dish on March 3 for Hina-Matsuri (the traditional girls’ festival). However, we enjoy it any time of the year. For example, when the weather is hot, we like it since the acidity in the sushi rice stimulates our palate. The vinegar also prevents the rice to go bad as quickly as unseasoned rice.
Although it is a kind of sushi, Chirashi Zushi is traditionally a homemade dish. “Nigiri Zushi” you often see at sushi restaurants and supermarkets, are usually prepared by professionally trained people. We call the football-shaped small rice piece topped with a strip of raw fish and so on Nigiri Zushi (“Grabbed sushi”), since it is formed in a palm of the hand.
3. Ingredients of Chirashi Zushi (About 5 servings)
For sushi rice
- 1.5 Cup (360ml) Japonica rice
- Water
- 3 1/3 -4 Tbsp (50-60 ml) vinegar
- 1 1/3 Tbsp (20 ml) sugar
- 1 tsp (5 ml) salt
Additional items for rice
- 1 small carrot, about 2 oz or 60 grams after peeling
- 5 dried shiitake mushrooms, about 2/3 oz or 20 grams
- 1 ¼ Tbsp soy sauce
- 1 ½ Tbsp sugar
- Salt, a pinch

For toppings
- 2-3 oz (60-90 grams) smoked salmon, thinly sliced in small pieces
- 2 eggs
- ¾ Cup (200 ml) or 4 oz (130g), fresh snow peas
- 1 Tbsp roasted white sesame seeds
- Vegetable oil, a little
- Salt, to taste
4. Recipe of Chirashi Zushi
Stage 1. Preparation of ingredients for sushi rice
(1) Soak shiitake for five hours (if the mushrooms are thin) or overnight (if they are thick) in cold water.

(2) Chop shiitake in thin strips and julienne the carrots. Alternatively, you can slice carrots into small pieces of about 0.5-inch (1-cm) square or diameter.
(3) Put the shiitake and carrots in a small pot, cover with the water used to soak shiitake, add soy sauce, sugar and salt, and bring to a boil on medium heat. Skim any white foam and continue cooking until the liquid is almost reduced to none. It takes about 30 minutes. The liquid can remain in the pot, just do not burn.

You can make this a couple of days ahead and keep it in the refrigerator until you are ready. In this case, take it out from the refrigerator and leave in the refrigerator 30-40 minutes before using.
Stage 2. Preparation of sushi rice
(4) Rince the rice and add water according to the package instruction. Remove and discard 4 Tbsp of water and cook. The result should be a little harder cooked rice.

(5) While cooking the rice, completely dissolve sugar and salt in the vinegar.
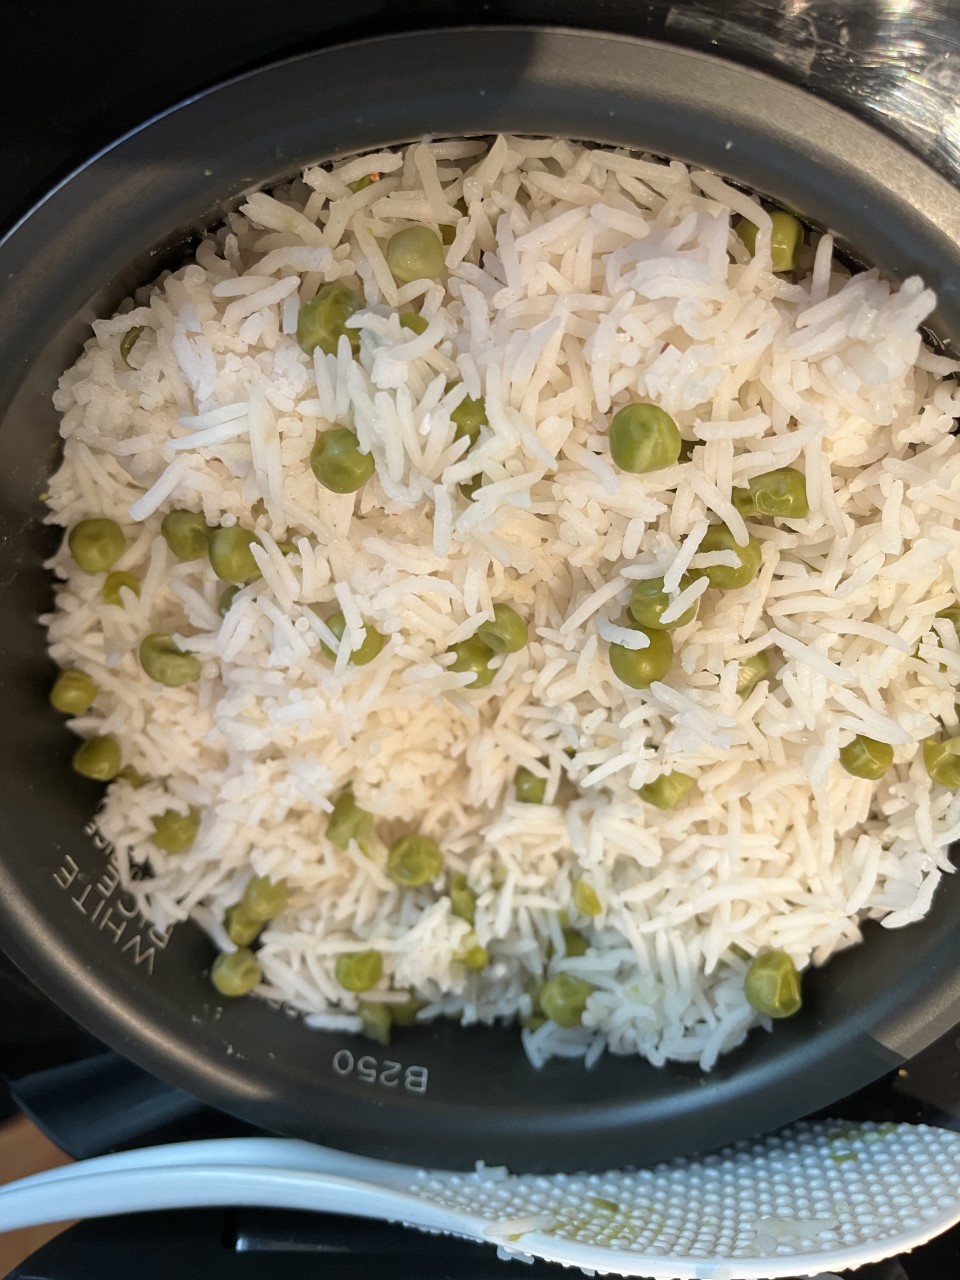
(6) When the rice is ready, transfer it to a large plate or into a large bowl. Sprinkle the sugar-vinegar mixture evenly on the rice. While the rice is very hot, mix it into the rice using a spatula. At the same time, fluff up the rice without squashing the rice grains. For tips on how to fluff the rice, please refer to: => Green Pea Rice
(7) When the sugar-vinegar mixture is absorbed in the rice (some say “when the rice has absorbed the vinegar and feels heavier as you move your spatula”), cool it quickly by fanning with a hand-held fan, a cardboard or a magazine, until the surface of the rice grains looks glossy. It would take three to four minutes, and this is to blow away excess liquid from the rice.
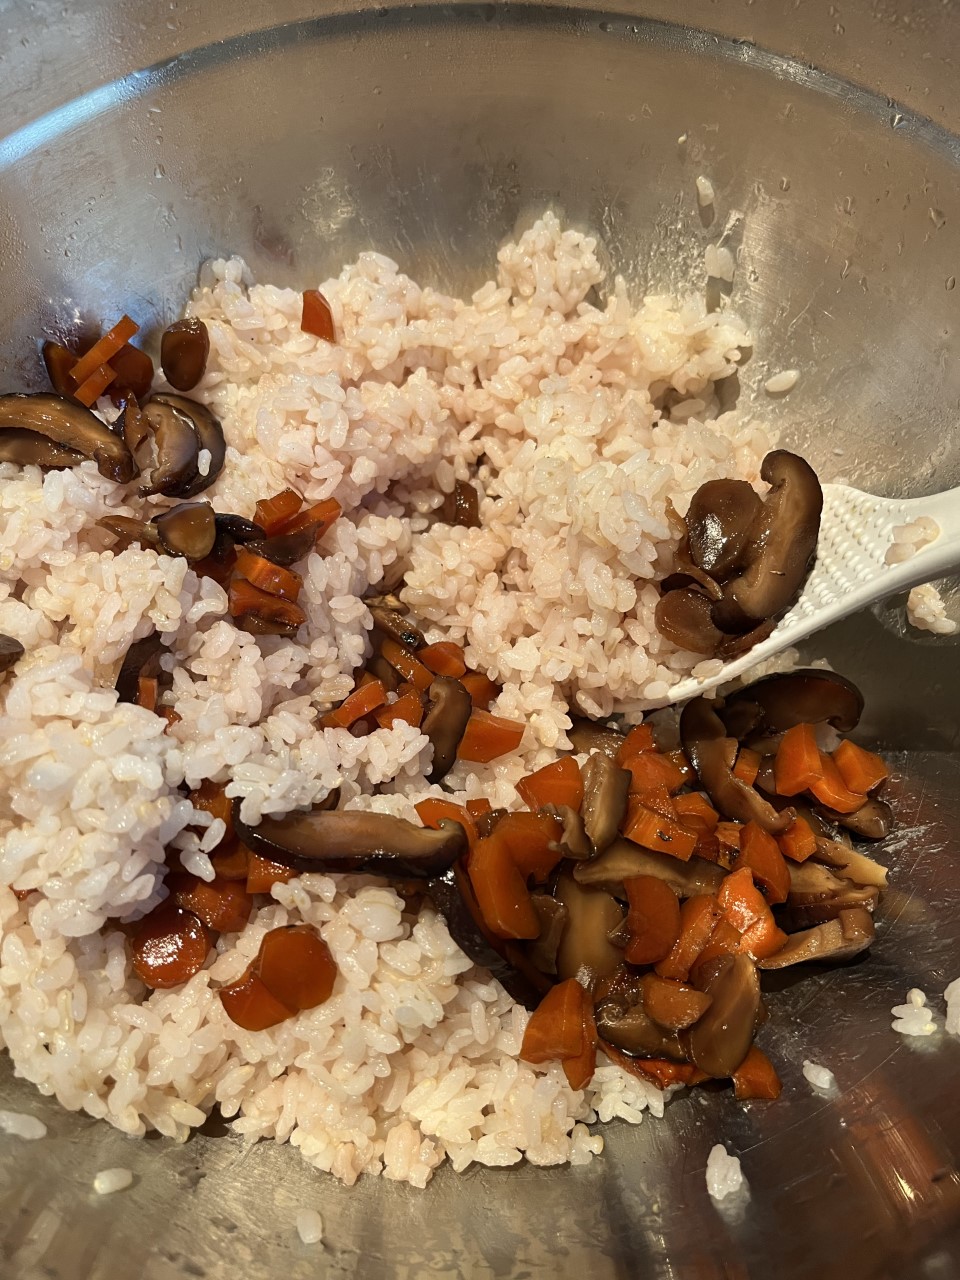
(8) Add the shiitake and carrot mixture and mix carefully. Make sure the rice is still warm while you do it.
Stage 3. Preparation of the toppings and assembly
(9) Make scrambled eggs. Alternatively, make a very thin (1/8-inch thick) omelet and shred it into thin strips of about ¼ inch wide.
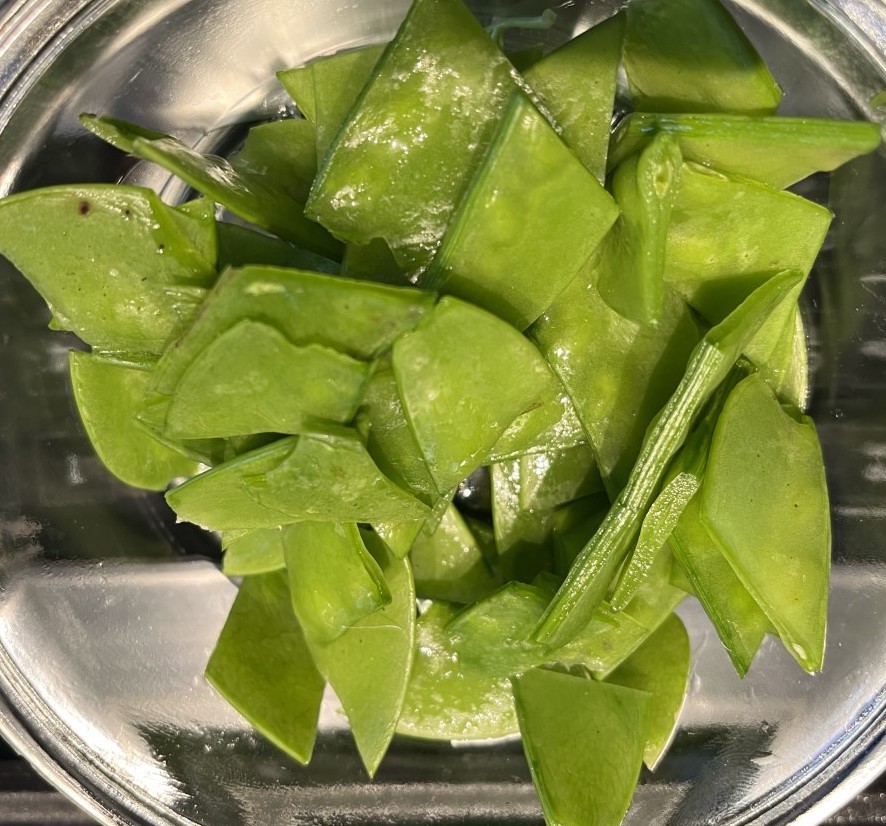
(10) Trim and cut snow peas diagonally into halves or thirds, and cook for 3 minutes in boiling, salted water.
(11) Place the toppings on the sushi rice so that their varied colors look nice on the white bed of rice. Sprinkle sesame seeds as garnish. It tastes best when the sesame seeds are still crunchy and the rice is lukewarm.
5. Some thoughts on the recipe
1. Rice
Traditionally, we use Japonica rice in any Japanese dish including this. We tried this recipe with basmati rice. Taste is the same, so the difference is the texture.
Basmati rice contains more amylose, a form of starch, feels lighter, and its grains are looser. So, we need a spoon to eat it.
On the other hand, Japonica rice is sticker, so it feels a little chewier to the palate, and they readily clump. Therefore, it is easy to eat it with chopsticks, as well as with a spoon.
2. Shiitake mushrooms
You may find dried shiitake at a local Asian grocery shop. If you don’t, you can use fresh shiitake, 2 oz (60 grams) for this recipe. Of course, you don’t have to soak it in water. Dried shiitake, when cooked, is chewier.
3. Color and ingredients
The variety of colors is important with this dish. Keep that in mind if you use alternative or additional ingredients.
As for your protein, many other things work including fresh tuna, canned tuna, fresh salmon, boiled shrimp, pan-seared scallops, even dices of ham or cheese. You can treat the seafood with just a little lemon juice or soy sauce. Remember soy sauce will add a little darkness to it.
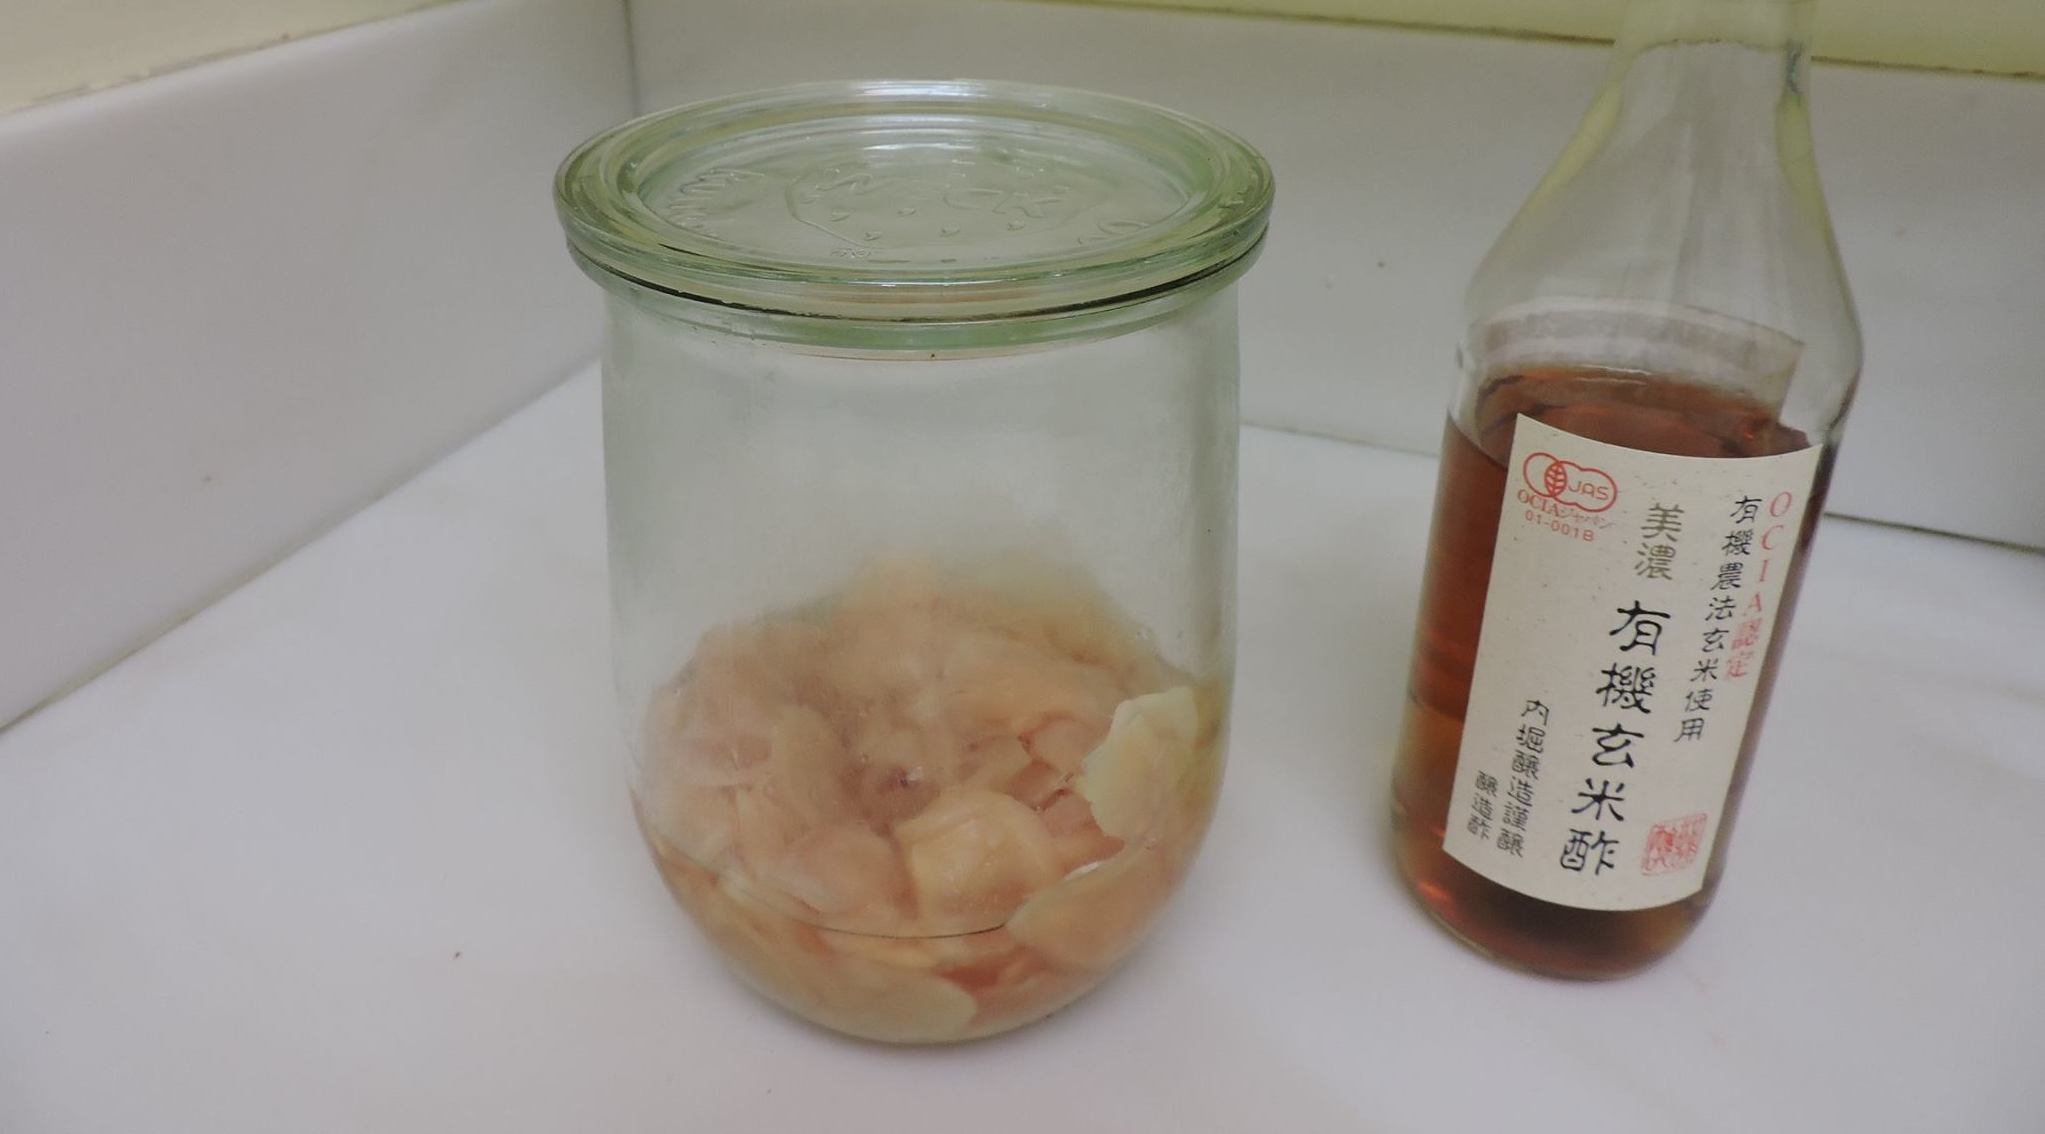
If you don’t have rice vinegar, other vinegar such as apple cider vinegar or white or red wine vinegar works fine. We recommend you clear colored vinegar.
The green color can be represented by such things as boiled green peas, boiled asparagus, avocado, broccoli florets, steamed spinach, white radish sprouts.
You can also use “gari” or pickled thin slices of ginger (a pale pink or beige topping). For how to make gari, please refer to: => How to Make “Gari”.
4. Taste
You will also enjoy a mélange of tastes in this dish: the sweet-sour rice, sweet mushrooms and carrots, salted toppings such as salmon and egg, and the natural sweetness of vegetables.
5. Storage
Refrigeration period may be different depending on the toppings, but the sushi rice with shiitake and carrot mixture can be stored in airtight container up to three weeks (I wouldn’t recommend it but it is true from my experience). The rice with the mixture also freezes well.
When you eat it after refrigeration, remember to warm it up by leaving in the room temperature for an hour, microwaving for 15 seconds or steaming for 5 minutes. This way, rice feels tastier.
6. Traditional ingredients
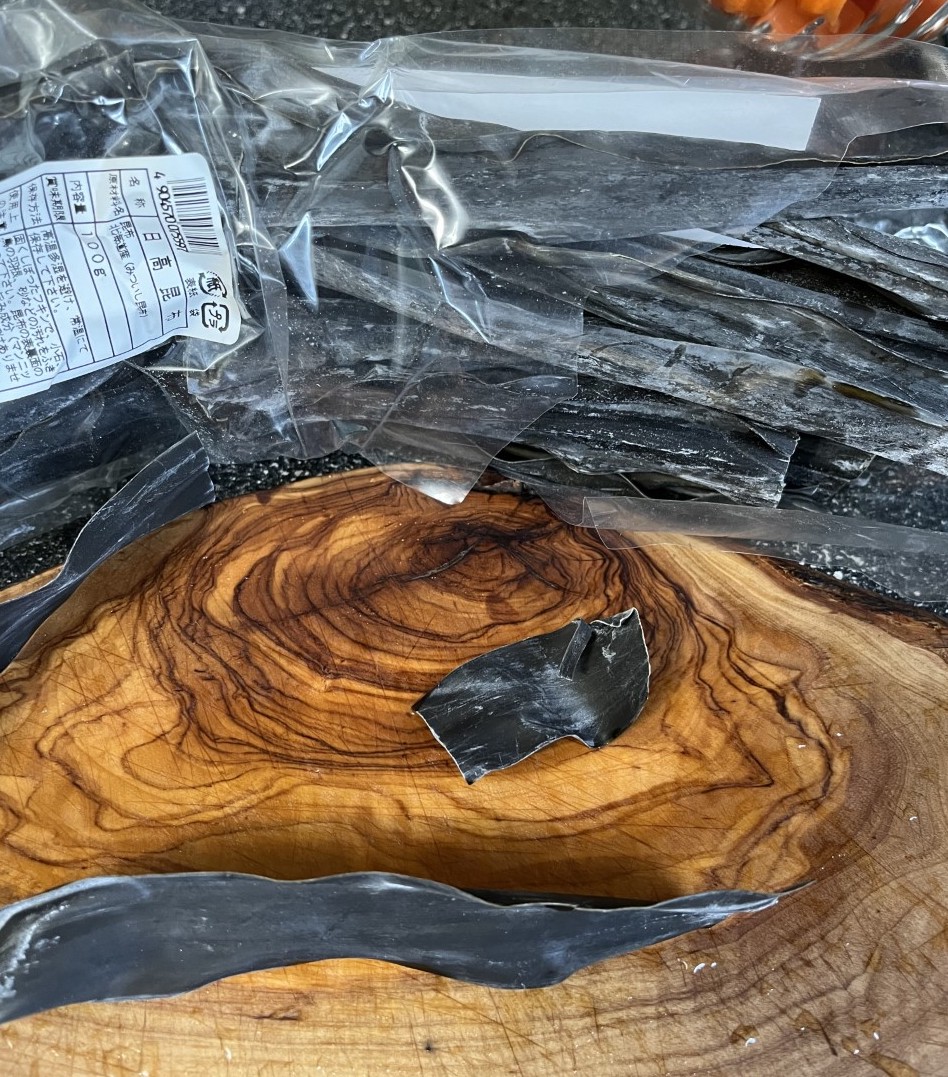
If you have an access to more authentic (we mean traditionally used in Japan) ingredients, kelp and lotus root are recommended additions.
It is difficult to find them in locally in Charleston, SC, so I didn’t include them in this recipe. But try them if you find them in your area, or if you would like to buy them on the Internet.
Kelp is a hard, dried seaweed. Break it by hand or cut it with kitchen scissors as necessary. Add a 2-inch square to the rice and water before cooking and It imparts subtle flavor of the sea, that you could call “umami”, to the rice.
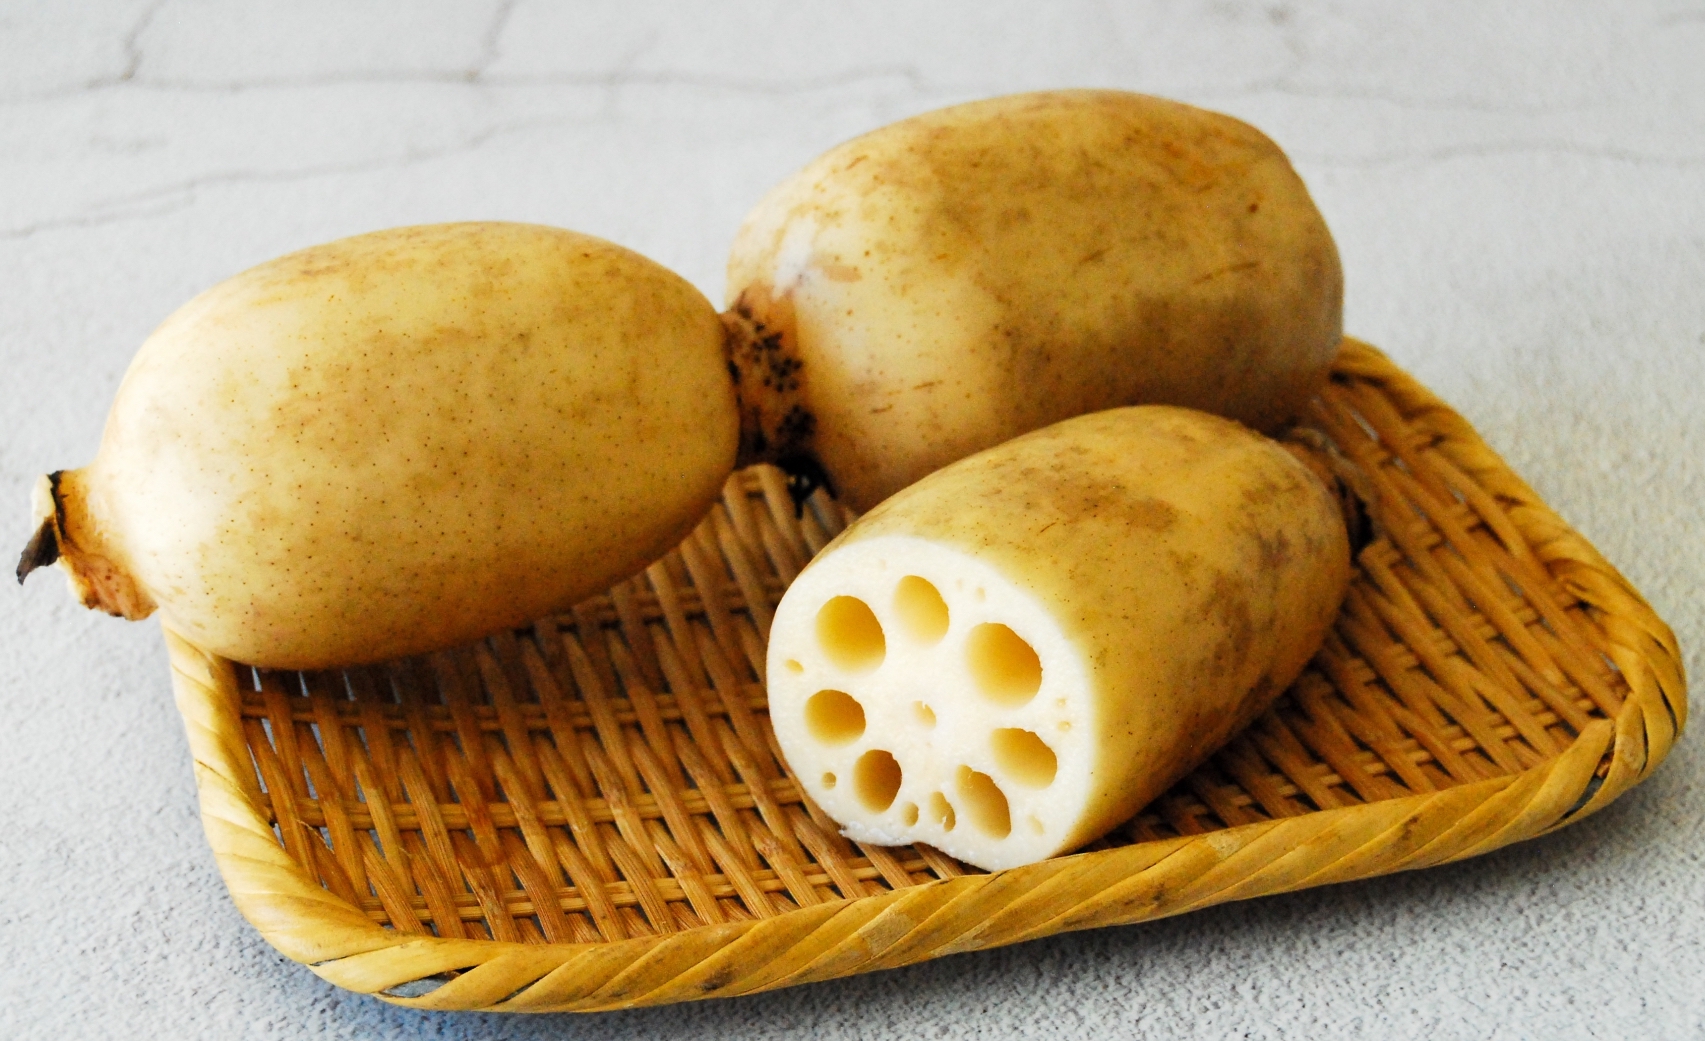
Lotus root looks a little like small daikon radish. Slice thinly crosswise and cook in the same liquid as shiitake and carrots. It will add a fun appearance and a pleasant crunch to your Chirashi Zushi.
With a lot of holes inside, the lotus root is a symbol of good luck. You can see through the holes, and it is likened to good visibility and good outlook!
[End of the English post]
ちらしずし
目次

1. 日本米で何が作れる?
2. ちらしずしとは何か
3. ちらしずしの材料(約5人分)
4. 作り方
5. 備考
1. 日本米で何を作る?
先日あるご夫婦に、いい日本米を買ったので、それが使えるレシピを頼まれました。この方々は料理が得意ですが、和食を作ったことはありません。
それで、簡単な「ちらしずし」のレシピを送りました。おすしの一種で、ご飯のサラダのような感覚で食べられるものです。数日後、二人の作ったちらしずしの素敵な写真が送られてきました。とても気に入ったそうです。
この記事では、そのレシピと、材料を好みに合わせて変える方法を紹介します。
2.ちらしずしとは
ちらしずしとは何でしょうか。
「ちらし」は動詞「ちらします」のマス語幹です。「ずし」は、「すし」の音が変わったもの。「すし」は酢で味付けをしたご飯です。一言で言えばちらしずしは、いろいろな食材を酢飯の上に散らすように置いた一品です。
小さな女の子のいる家庭では、3月3日のひな祭りの日によくちらしずしを作ります。でも、一年中いつでも食べられます。例えば暑い日はあまり食べる気になれなくても、酢飯の酸っぱさで食欲がわくし、酢飯はそのままのご飯より傷みにくい。
お寿司といっても、ちらしずしは家庭料理です。皆さんがよくすし屋やスーパーで見かける、生の魚など載せた小さなフットボール型のご飯は「握りずし」で、プロのすし職人が作るものとされています。
3. ちらしずしの材料(約5人分)
酢飯
- 米 2合 (360 cc)
- 水
- 米酢 大さじ3と1/3 ~4(50~60 cc)
- 砂糖 小さじ1と1/3 (20 cc)
- 塩 小さじ1 (5cc)
酢飯に混ぜるもの
- にんじん 小半本 (皮をむいて60グラムぐらい)
- 干ししいたけ 5枚(20グラムぐらい)
- 醤油 大さじ1と1/3 (20 cc)
- 砂糖 大さじ一杯半 (22.5 cc)
- 油 少々
- 塩 一つまみ
トッピング
- スモークサーモン60~90 g (2~3オンス)、小さく薄切りにする
- 卵 2個
- 絹さや 200 ccまたは 130g (4オンス)ぐらい
- 炒りごま(白) 大さじ1
- 植物油 少々
- 塩 少々
4. ちらしずしの作り方
第一段階 酢飯の材料の下ごしらえ
(1) しいたけを、5時間~一晩冷水に漬ける。
(2) しいたけを薄切りにし、にんじんを細切りまたは1センチ角または直径1センチの薄切りにする。
(3) しいたけとにんじんを小さな鍋に入れ、しいたけの戻し汁と合わせて、かぶるぐらいの水を入れる。醤油、砂糖、塩を加え、中火で煮立てる。白い泡が出たらすくって捨て、水分がなくなるまで30 分ほど煮詰める。鍋に汁が残っていてもいいので、焦がさないように。
これは数日前に作っておいて、使う前まで冷蔵しておいてもよい。そ使う時は冷蔵庫から出して、30分か40分室温に置いておく。
第二段階 酢飯
(4) 米をさっと洗い、なべを使うなら米の入っていた袋の説明書通りの分量の水、または炊飯器に必要な水を加える。大さじ4杯の水を捨ててから炊く。少し固めの炊きあがりになる。
(5) 米が炊けている間に、酢に砂糖と塩を完全に溶かす。
(6) 炊けたご飯を大きなお皿か、大きなボウルに移す。混ぜ合わせた甘酢をまんべんなく振りかけ、ご飯が熱いうちにしゃもじで混ぜ込む。同時に、ご飯粒をつぶさずに、ほぐすようにする。ほぐし方のコツは、こちらをご覧下さい => 豆ごはん
(7) ご飯が甘酢を吸収したら(米が甘酢を吸って、しゃもじが少し重く感じるようになったらとも言う)、うちわか厚紙、雑誌などで米粒に照りが出るまで3、4分あおぐ。これは、余分な酢を米粒の表面から飛ばすため。
(8) ご飯がまだ温かいうち。しいたけとにんじんを加えて、そっと混ぜ込む。
第三段階 トッピングと仕上げ
(9) スクランブルエッグを作る。または、とても薄いオムレツを作って、6ミリ幅の細切りにする。
(10) きぬさやの前後を切り落とし、斜めに切る。一つのきぬさやを二つか三つに切る。少し塩を入れた熱湯で3分茹でる。
(11) スモークサーモン、スクランブルエッグ、きぬさやを、色どりがきれいに見えるように酢飯に載せる。飾りにいりごまを振りかける。いりごまがまだカリカリしていて、ご飯が少し温かいうちにいただくとおいしい。
5. 備考
1. 米
もともと日本では何にでもジャポニカ米を使いますが、このレシピをバスマティ米でやってみました。味は同じですが、食感が違います。
バスマティ米はでんぷんであるアミラーゼを多く含んでいるので、より軽く感じます。また、米粒同士がさらさらしてくっつきにくい。そのため、食べるにはスプーンがいります。
一方、ジャポニカ米はより粘り気が多く、噛み応えがある感じがします。米粒同士が塊を作りやすいため、スプーンはもちろん、箸でも食べやすい。
2. 干ししいたけ
干ししいたけが近くのアジア食料品店になかったら、生のしいたけ(5個または60グラムぐらい)を使っても構いません。もちろん水で戻す必要はありません。
なお、干ししいたけで作ると、もっと噛み応えがある感じです。
3. 色味と材料
この料理では色彩が大切ですから、代わりの材料を使ったり、材料を足したりするとき、いろどりを考慮してください。
蛋白質でいえば、まぐろやツナ缶、生鮭、ゆでたエビ、焼いたホタテ、サイコロに切ったハムやチーズ、その他いろいろなものが使えます。海鮮はちょっとレモン汁や醤油を垂らして使っても。醤油を使うと、色が少し茶色くなります。
米酢がなければ、他の酢でできます。アップルサイダー酢でもワイン酢でもおいしくできます。無色の酢ががいいとおもいます。
緑色は、ゆでたグリンピース、アスパラガスやブロッコリ、アボカド、蒸したほうれん草、カイワレ大根なども使えます。
「ガリ」または、甘酢に漬けた薄切りのショウガを、薄いピンクかベージュのトッピングに使ってもいいです。ガリの作り方は、こちらをご覧ください => ガリの作り方.
4. 味
このレシピでは、甘酸っぱいご飯、しいたけとにんじんの煮付けの甘さ、スモークサーモンや卵などのトッピングの塩味、味付けしていない緑の野菜の自然の甘みの組み合わせを楽しみます。
5. 保存
冷蔵期間はトッピングの種類によって違いますが、しいたけとにんじんの混ざった酢飯は密閉容器に入れて冷蔵庫で3週間はもちます(お勧めはしませんが、私の経験では大丈夫です)。冷凍しても味は変わりません。
冷蔵庫から出して食べる時は、1時間ほど室温に置いておいたり、15秒電子レンジに15秒かける、5分だけ蒸すなどして、ちょっとだけ温めると、ご飯がおいしいです。
6. 伝統的な材料
もし手に入るなら、昆布とレンコンも使えると、より本物(日本で作るもの)らしくなります。
サウスカロライナ州チャールストンでは、店で入手しにくいので、このレシピには入れませんでした。でも、近所の店やインターネットで手に入れば使ってみてください。
昆布は固い、乾燥させた海藻です。手で割るか台所用ハサミで必要なだけ切ります。5センチ角ぐらいの昆布を炊く前の米と水に加えると、炊きあがったご飯に少し海の風味が加わります。
レンコンは小さな大根のようにも見える根菜です。薄く輪切りにし、しいたけとにんじんと一緒に煮ます。見たところが可愛くて、カリッとした歯ごたえが加わります。
たくさん穴があいているので、レンコンは縁起のいい食べ物でもあります。穴を通して向こう側が見えるので、視界が良いこと、見通しが明るいことにかけて。
[和文部終わり]