和訳は英文の下にございます。/ The Japanese translation is below the English text.
MAKING A BOOKMARK
Contents

(1) The string bookmarks
(2) How to make a triangle paper bookmark
(3) The etymology of “shiori”, the bookmark
(4) A little travel plan brochure

(1) The string bookmarks
Do you like reading books?
Recently, I read some exchanging of opinions about their reading experiences on a Japanese Internet bulletin board.
One of them said that she missed paperback books with a “spin”.
I didn’t know what “spin” was, and neither did many others. Then we learned that was a professional term in the publishing business. It meant the thin, woven string bookmark attached to the spine of a book.

But why did they call it “spin”? There are several theories for the origin, but one of them was the most persuasive to me. According to it, it came from the English word “spine”, since the bookmark is attached to the spine of a book bound in the Western style. And “spine” is pronounced “s/pee/neh” in Japanese.
Return to the conversation, people agreed that paperbacks seldom come with the string bookmarks nowadays.
To counter the situation, some said they bought or made a book cover with a string bookmark. Others said they used strips of Post Its, and so on.
One said she was happy with her hand-made “triangle bookmarks” of paper.
We found how to make it, and we tried it.
She was right; it was so easy and convenient that we would like to share it with you.
(2) How to make a paper triangle bookmark
We will use a square piece of paper 3 inches x 3 inches (7.5 cm x 7.5 cm). It can be small origami paper, pretty wrapping paper, post-It and so on.
1. Fold the paper on sides. It becomes a rectangle. [See Photo 1]
2. Fold it again and make a square a quarter of the original size. Open it to restore the rectangle. We will call the center crease “Line A” [Still Photo 1].
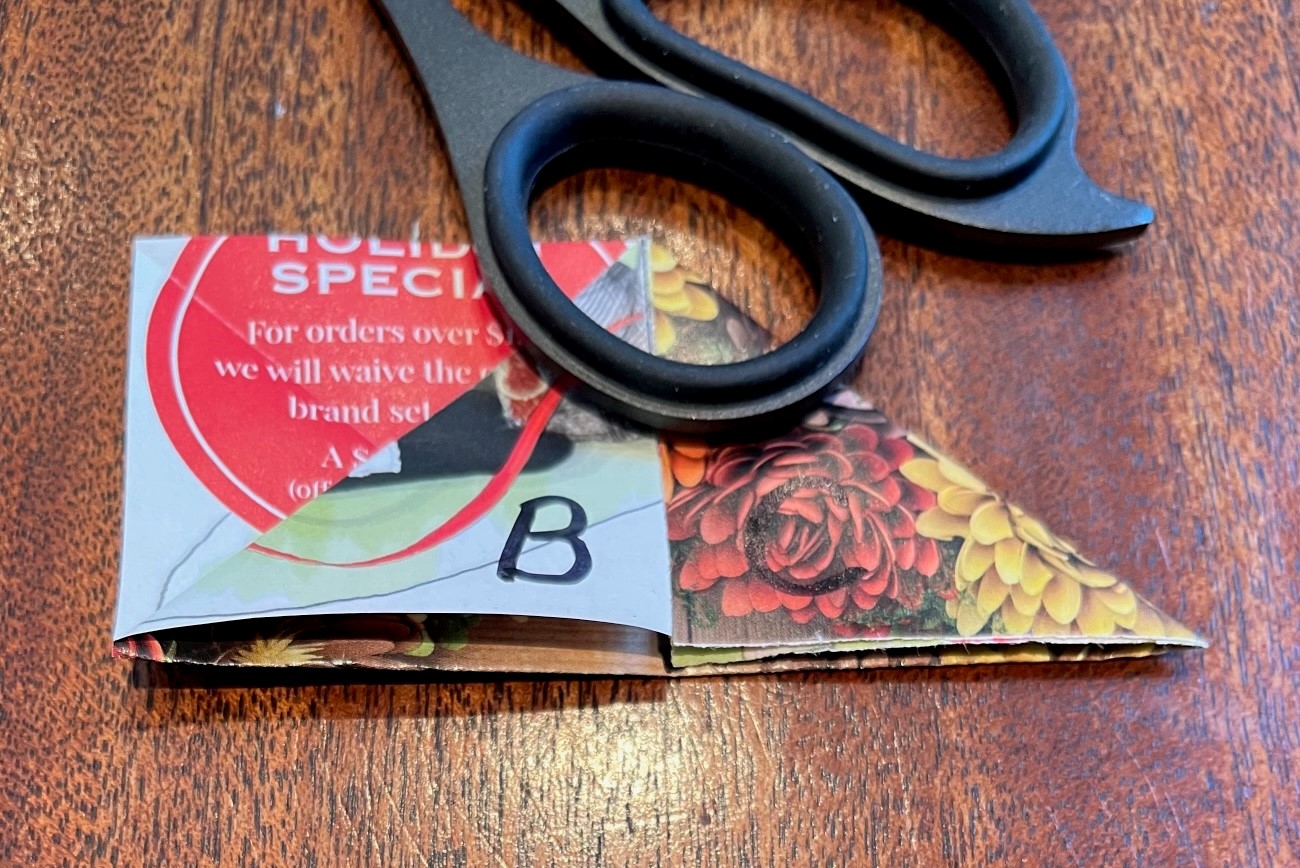
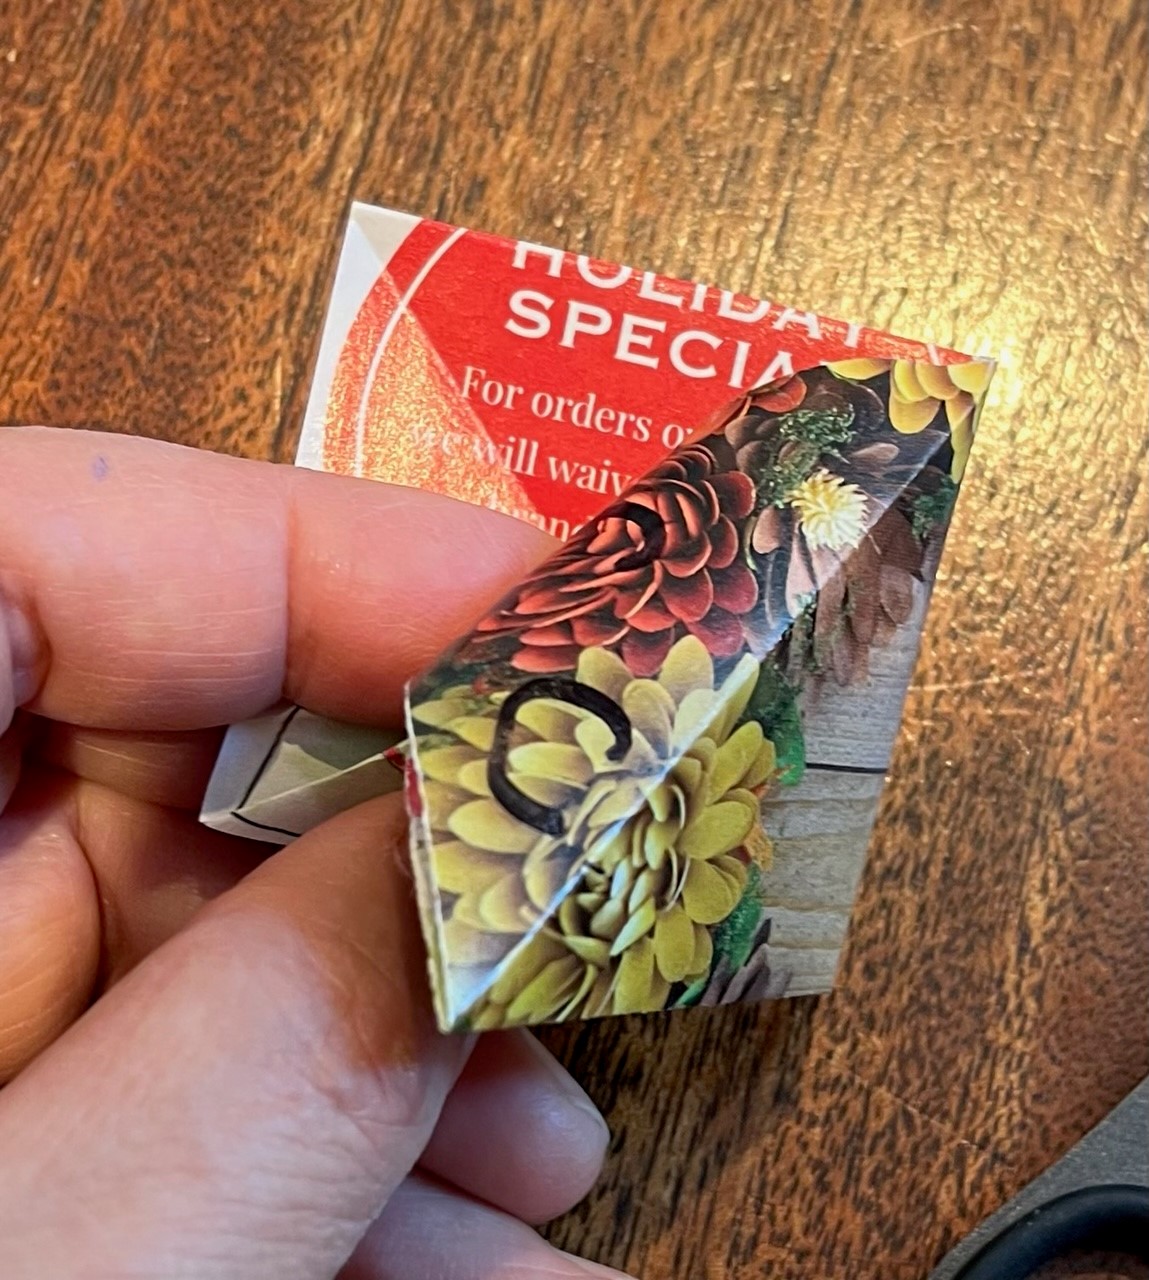
3. Pick only one layer from one of the open corners. Fold it into a triangle along Line A (We will call it Flap B) [Photo 2].
4. Hold both layers of the other open corner. Fold the layers together into a triangle along Line A (We will call it Flap C) [Photo 3].
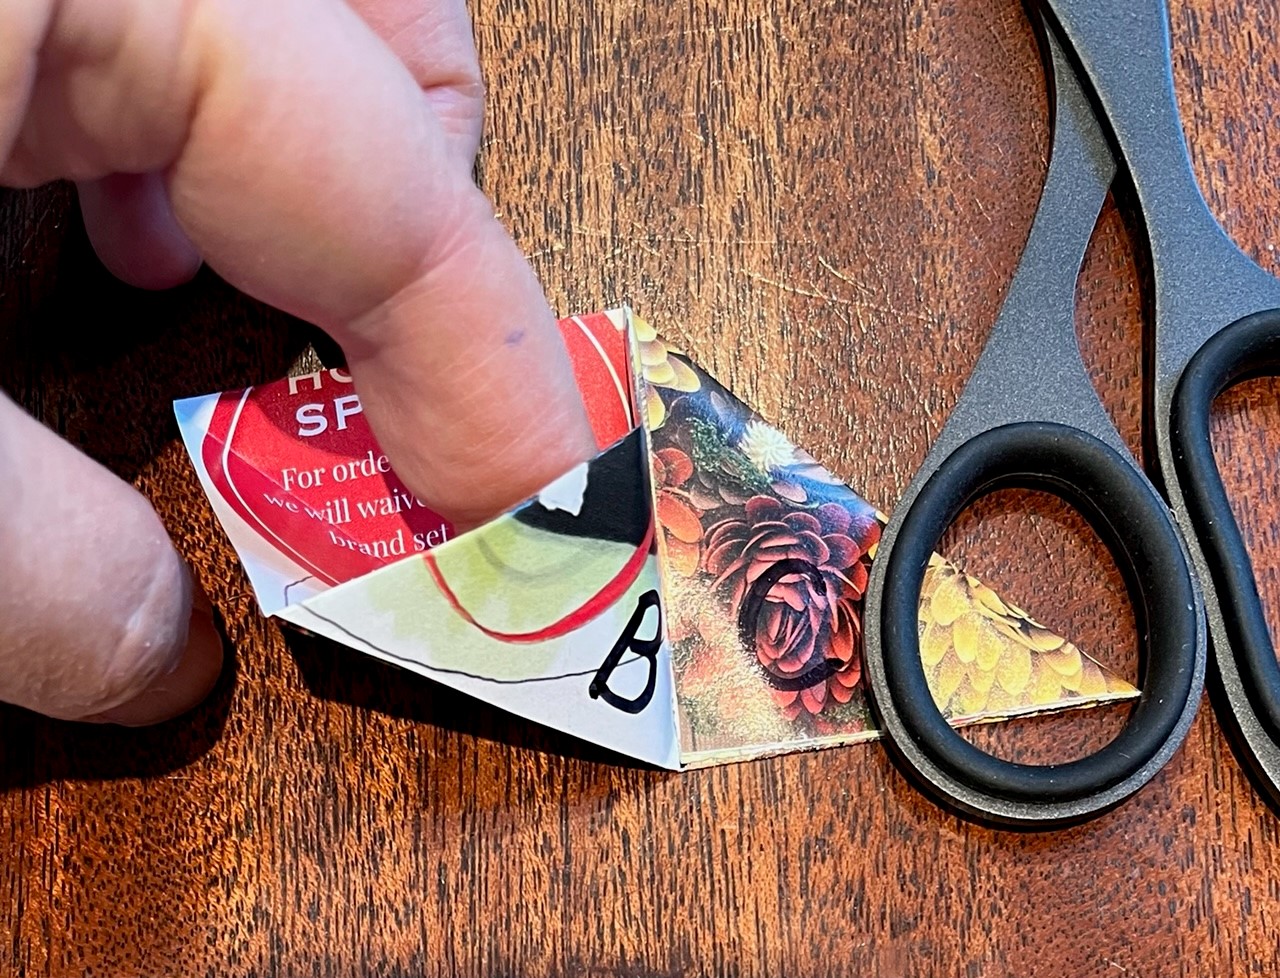
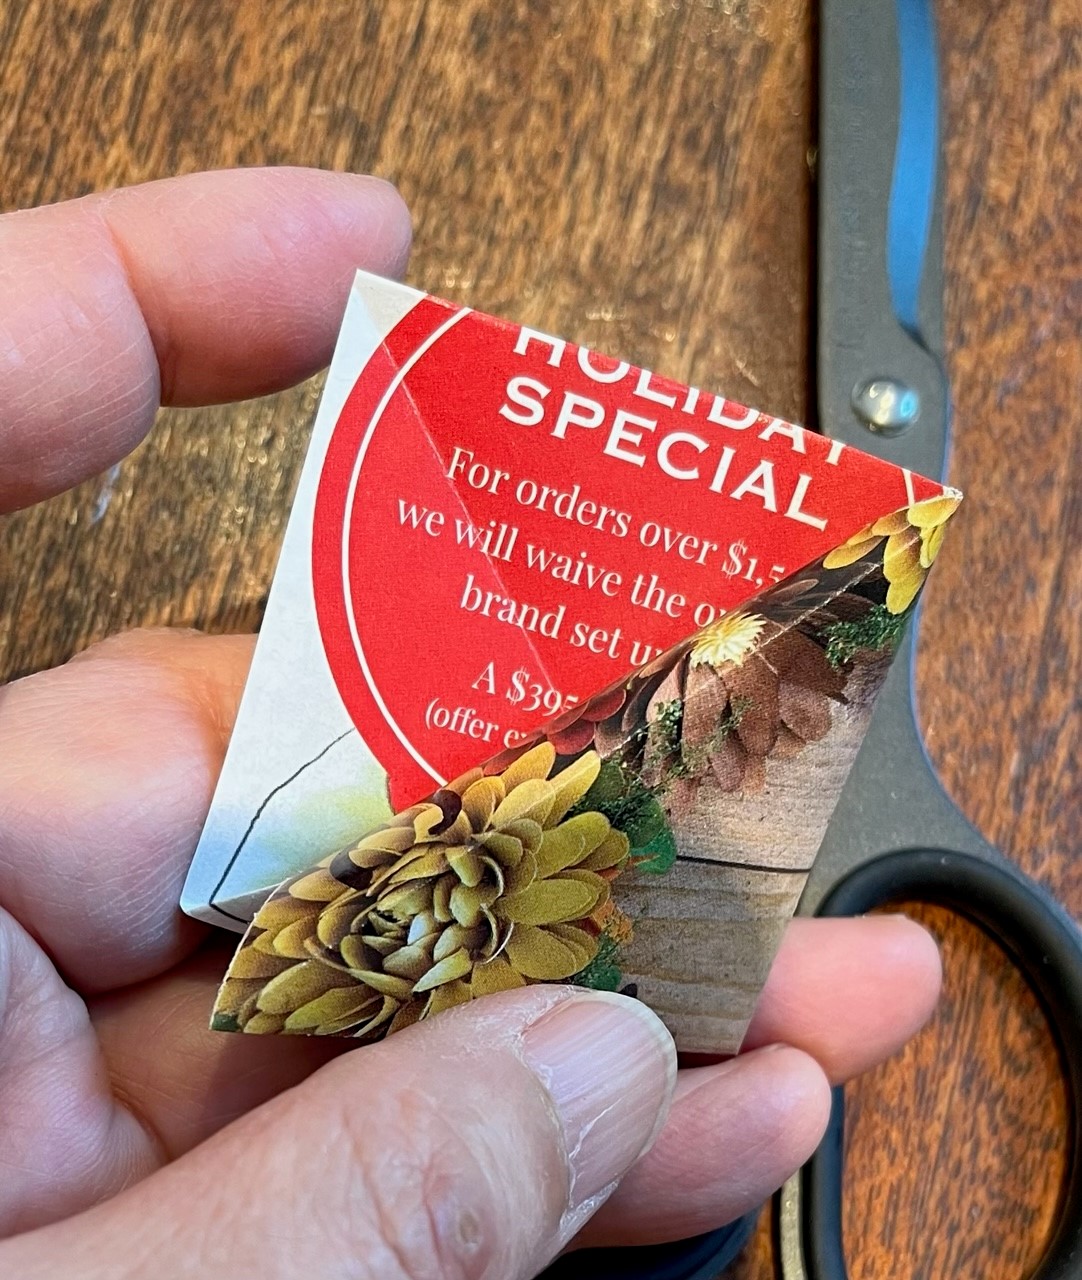
5. A pocket has been created beneath Flap B. While you hold Flap C securely with one hand, stick a finger of the other hand in the pocket all the way and keep it open [Photo 4].
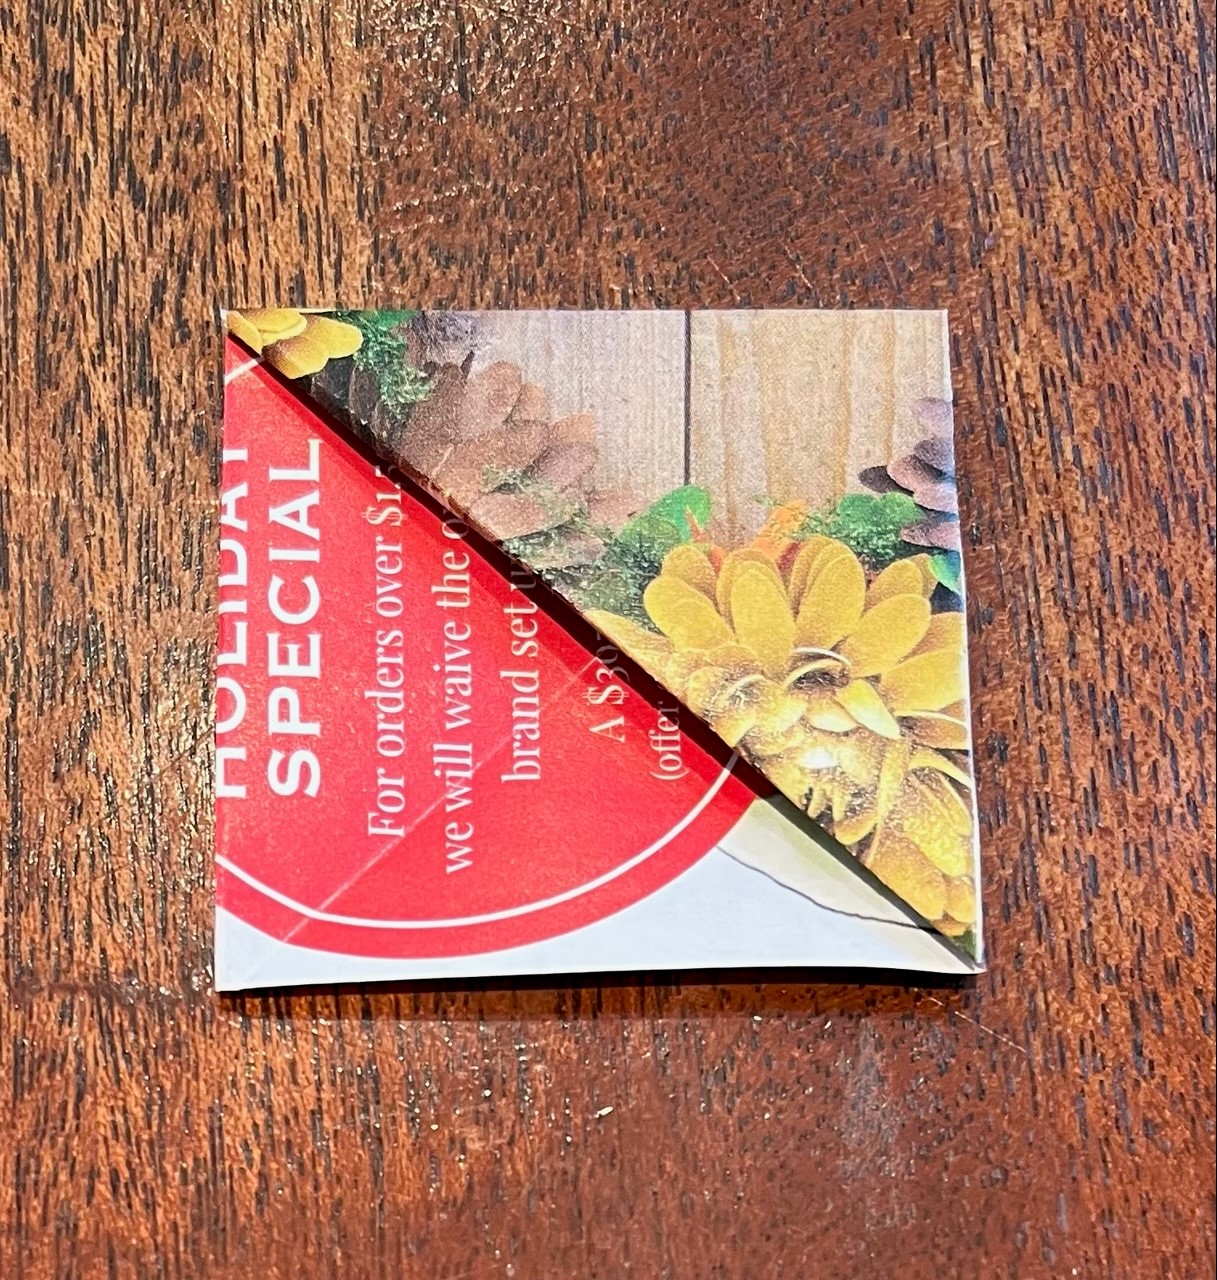
6. With your finger still in the pocket, half open Flap C. Bend the paper along Line A, so that the corner of Flap C approaches the opening of the pocket [Photo 5]. Then remove your finger from the pocket, push Flap C carefully into the pocket from its corner [Photo 6]. When it’s all the way in the pocket, squash down. [Photo 7]
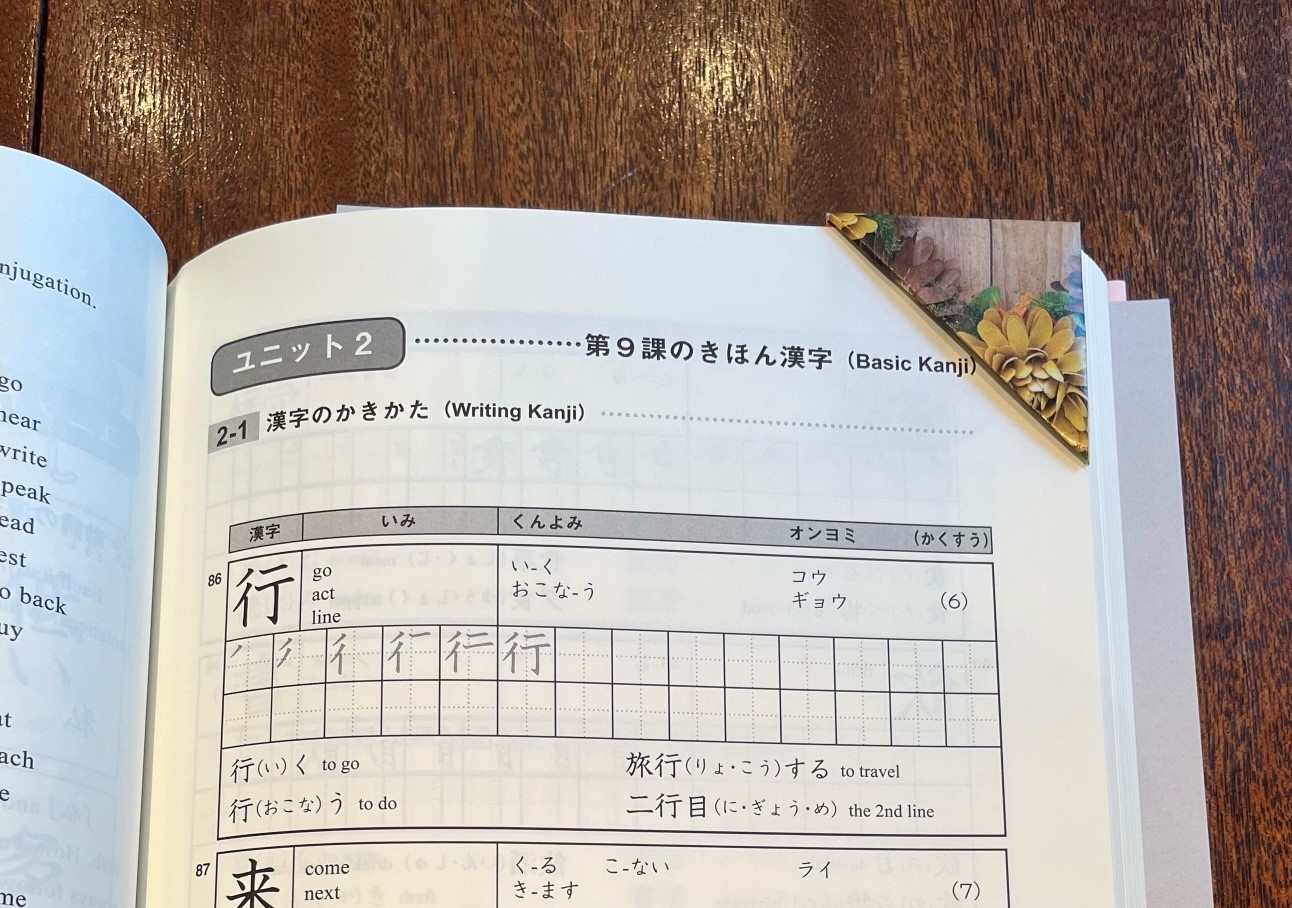
7. Insert the corner of the page you are reading into the pocket of the bookmark! [Photo 8]
(3) The etymology of “shiori”, the bookmark
“Shiori” is the Japanese word for a bookmark. It is derived from the ancient verb, “shioru”.
“Shioru” means to make a road sign when walking in the mountains and in the wild by breaking a branch of a tree. It therefore means to show the way to someone as well. From that, they began to say “shiori” for a signpost and for a bookmark.
The Chinese character for a bookmark, “栞”, contains a shape of a tree (“木”) in it, so we think ancient Chinese people also broke branches to make a road sign.
(4) A little travel plan brochure
There is an expression “[something] no shiori” (shiori of [something]).
For example, “Tabi no Shiori (Shiori of Travel)” means a very simple travel guide or a thin brochure. It is not a heavy, thorough guidebook.
When we were small, our teacher always gave each of us an “Ensoku no Shiori (Shiori of Excursion)” several days before a school trip. It was just stapled few sheets of paper explaining what to wear and to bring, the itinerary, information about the destination, and so on.
In high school, “shiori” making was a big project. We were going to Kyoto and Nara on a school trip, and we had to compile “Shuugaku-Ryokoo no Shiori (Shiori of School Trip)”. It involved a lot of searching and writing about the history and important anecdotes about the places to visit.
I also hear that when two persons are going to get married, they sometimes plan a formal meeting to introduce their respective families. For that occasion, they may create a fancy brochure titled “Kao-Awase no Shiori (Shiori for the Introductory Meeting)”. It contains the greetings of a couple to both families, the couple’s backgrounds, names of the family members and their relationships, and so on.
So, I had heard the word “shiori” often enough, but I never wondered why these small brochures were called bookmarks. But if the original meaning of “shiori” was a road sign and a guide to the unknown or little-known world, I understand.
These days, we have not travelled for many reasons, but I would like to make trips again! When that happens, I will plan my itinerary, search on my destinations, and put them together into my own “Tabi no Shiori”, a little travel plan brochure.
[The end of the English post]
しおりを作る
目次

(1)ひものしおり
(2)紙の三角しおりの作り方
(3)しおりの語源
(4)旅のしおり
(1)ひものしおり
読書はお好きですか?
最近、インターネットの掲示板で、読書好きな日本人が何人か、意見を交換していました。
その中で、この頃「スピン」の付いた文庫本がなくて残念だという人がいました。
私も、他の何人かも「スピン」が何かわからなくて、本の背についている細いひものしおりのことだと教わりました。出版業界の用語だそうです。
なぜひものしおりを「スピン」というのか。諸説ありますが、本の背を指す英語の「スパインspine」が語源という説が理解しやすい。洋綴じ本の背(スパイン)から出ているひもしおりだから、と。そしてspineは日本語で読むとスピネになります。
さっきの会話に戻りますが、やはりみんな「スピン」のついている文庫本は少なくなったと同意しました。
そこで、ひものしおりのついたブックカバーを買うか作るかしているという人がいました。他の人は、細く切ったポストイットを使う、とか。
ある人が、自分で作った紙の三角しおりが気に入っていると言いました。
私たちはその作り方を見つけて、やってみました。
確かに、とても簡単で便利なので、次の節で作り方をご紹介します。
(2)紙の三角しおりの作り方
7.5センチ (3インチ) 四方の正方形の紙を用意します。小さめの折り紙、きれいな包装紙、ポストイットなどでも。
1.紙を横に半分に折ります。長方形になります。
2.また半分に折ると、元の四分の一の大きさの正方形になりますが、それを広げてまた長方形の状態に戻します。この中心の線をAの線と呼びます[写真1]。
3.開いている角のうち、上の一枚をつまみ、Aの線に沿って三角に折り込みます。これを袖Bとします[写真2]。
4.開いているもう一つの角は、二枚合わせて、Aの線に沿って三角に折ります (これを袖Cとします) [写真3]。
5.袖Bの下には三角のポケットができています。袖Cを反対の手で押さえながら、ポケットに反対の手の指を奥まで入れて広げます[写真4]。
6.指をポケットに入れたまま、袖C半分開きます。Aの線から紙を閉じるようにすると、袖Cの角がポケットの入り口に近づきます[写真5]。そうしたら指をポケットから抜き、袖Cを角から丁寧にポケットへ差し込みます[写真6]。一番奥まで行ったら、上から押さえます[写真7]。
7.あなたが読んでいるページ角をしおりのポケットに差し込んでみてください![写真8]
(3)しおりの語源
日本語の「しおり」は、古語の「しおる」という昔の動詞から来ています。
「しおる」は、山道などを歩くとき、木の枝を折って迷わないように道しるべとすること、そこから、道案内をすることでした。そこから、道しるべを「しおり」と言ったり、書物の間に挟んで目印とするものを「しおり」と言うようになったそうです。
漢字でも栞という字には「木」が入っているので、古代中国の人々もきっと枝を折って道しるべにしていたのでしょうね。
(4)旅のしおり
「〇〇のしおり」という言葉があります。
例えば、「旅のしおり」なら旅行の簡単な案内やパンフレットのことです。大きなガイドブックではありません。
子どもの時は遠足の数日前に、先生に「遠足のしおり」をもらいました。紙をホチキスで止めただけの簡単なもので、当日の服装や持ち物、予定、行くところの説明などが書いてありました。
高校では、「しおり」づくりは一仕事でした。京都や奈良へ修学旅行に行く前、事前に行く場所の歴史や重要な出来事を調べ、「修学旅行のしおり」を作らなければならなかったのです。
人が結婚するとき、双方の家族が初めて正式に集まる計画を立てて、その時のために「顔合わせのしおり」を作ることがあるそうです。結婚する二人の挨拶、二人のプロフィール、家族の名前や関係の載った立派なパンフレットです。
つまり、私は「しおり」という言葉は聞き慣れていましたが、なぜこれらの小冊子が本のしおり同じ言葉で呼ばれるのか、考えたことがありませんでした。でも、しおりの元々の意味が未知の世界での道しるべまたは道案内ということであれば、わかる気がします。
この頃、いろいろな事情で旅行に行くことがなくなりましたが、また旅行をしたいものです。その折には、予定や行きたいところをよく調べて、自分の旅のしおりを作ってみたいと思います。
[和文部終わり]